Heated grips aren’t just for road bikes. Frozen hands won’t help your throttle or clutch control
STORY & PHOTOGRAPHY MAX SULLIVAN

Winter is here but that shouldn’t stop you riding. However, the early mornings can be very painful when your hands and fingers start to freeze! Trail riders who have to do a little transport on the road to get to their favourite track will know exactly what I’m talking about. So fit some heated grips and enjoy your winter ride.
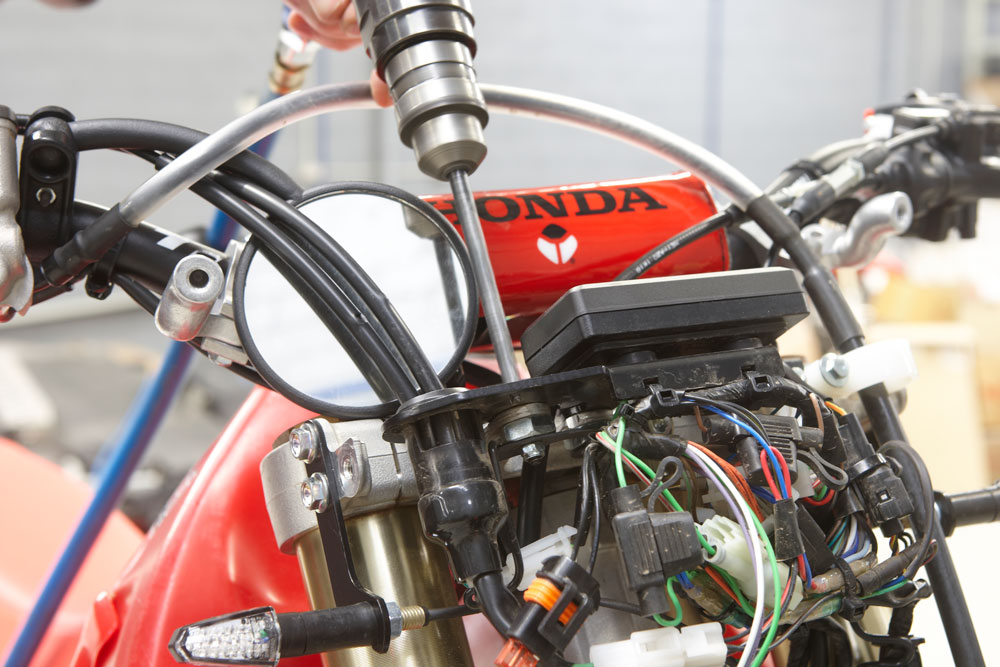
GAINING ACCESS
First up, I need access to the handlebars and wiring loom so I need to remove the headlight and take off the grips. To make removal of my Barkbusters easy, I loosen the end bolt a few threads, then tap the bolt with a soft-face mallet. This will push the tapered nut inside and loosen the grip on the handlebar. The front mount bolt is removed and the Barkbusters slide out easily — without losing the tapered nut deep inside the handlebars.
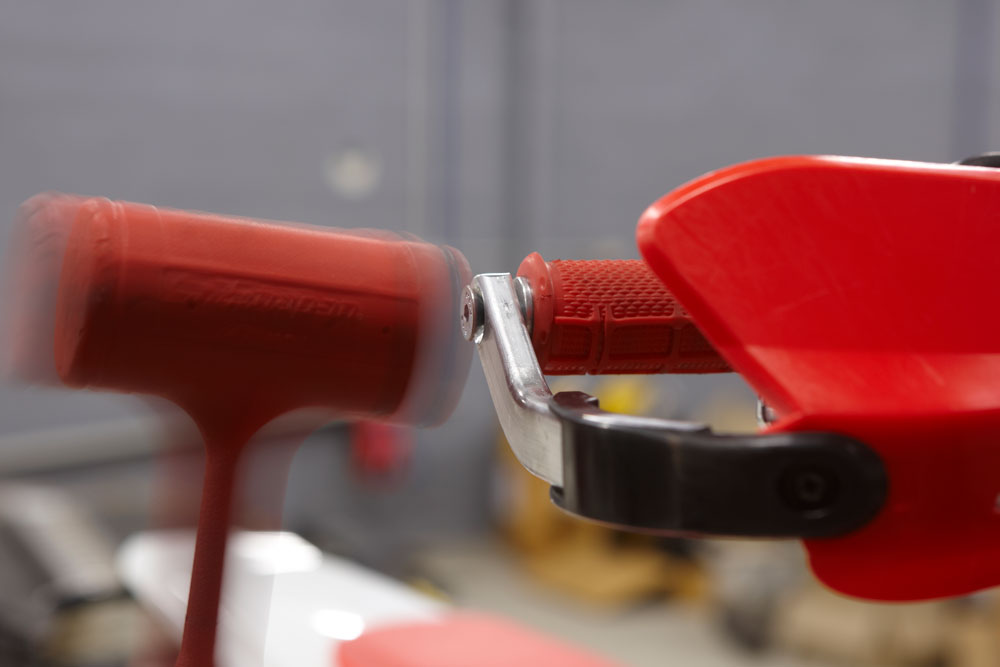
NO BALLOON, NO PARTY
There are several ways to remove grips. If you’re taking off old, worn ones, a nice sharp razor blade will make removal quick and easy. My preferred way of removal is with compressed air. Slide the tip of an air gun under one end of the grip and squeeze. The air will pump up the grip and release it from the throttle tube or handlebar. Pulling back at the same time will remove the grip. If you’re careful not to overinflate and stretch the grip, it can be refitted to the handlebars.
POWER UP
The instructions for the heated grips might suggest fitting the power lead straight to the battery. However, this means if the switch is left on, or bumped in transit, the grips will be on, flattening the battery. The best option is to find a “switch power” wire, which has battery voltage when the bike is running but when the bike is off, the grips will be off. If the circuit is not fused, an inline fuse should be fitted to protect the circuit.
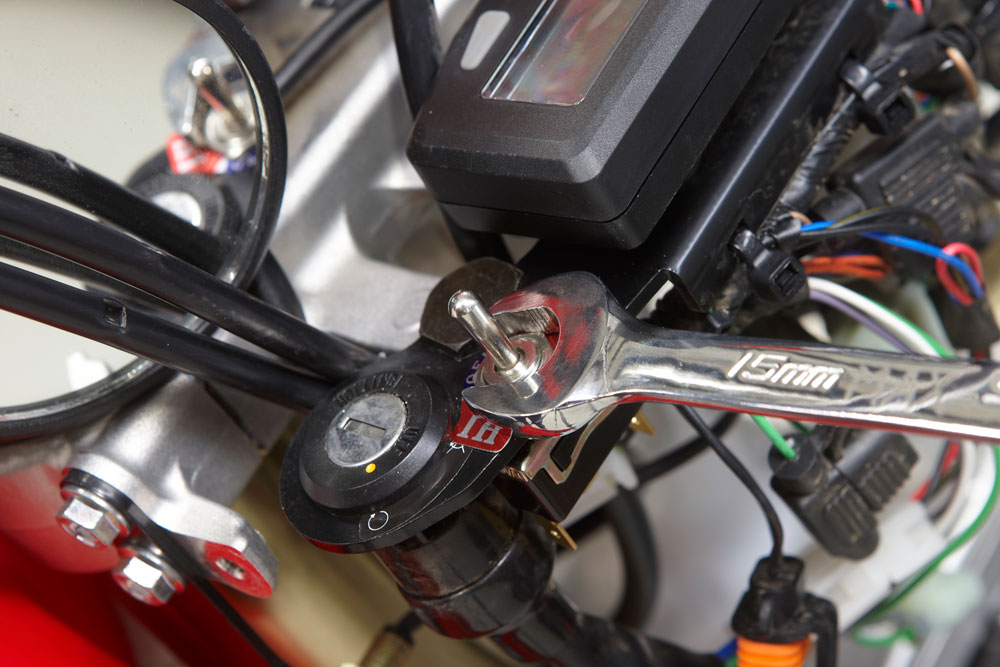
DRILL SERGEANT
You’ll need to find a suitable place to mount the toggle switch. While anywhere on the bike is acceptable, it’s handy to be able to reach the switch on the go. On this CRF, there is just enough room to mount the switch beside the ignition key and speedometer. Centre-punch the plate then drill a small pilot hole first to check the position. Now drill a large 13mm hole to accommodate the heated grip switch.
OFF CENTRE
The switch supplied is a two-way switch, with “off” in the centre, “low” to one side and “hi” to the other. This allows the grip heaters to operate at two temperature settings, which comes in very handy as the day warms up. Start the grips on “hi” when using them, as the left-hand grip will take a bit longer to warm up since the element is directly on the alloy handlebars. Tighten the locating nut but be careful not to over-tighten since the thread is very fine.
HARSH ELEMENTS
The heating elements need to be placed on either side of the handlebars. Clean the left side of the ’bars, as well as the throttle tube on the right, with contact cleaner. Then peel off the protective layer and stick down the element. I use electrical tape wrapped around the element to hold it in place for a while till the adhesive takes hold. Be sure to position the wires underneath and away from other controls as they cannot be relocated once the elements are in place.
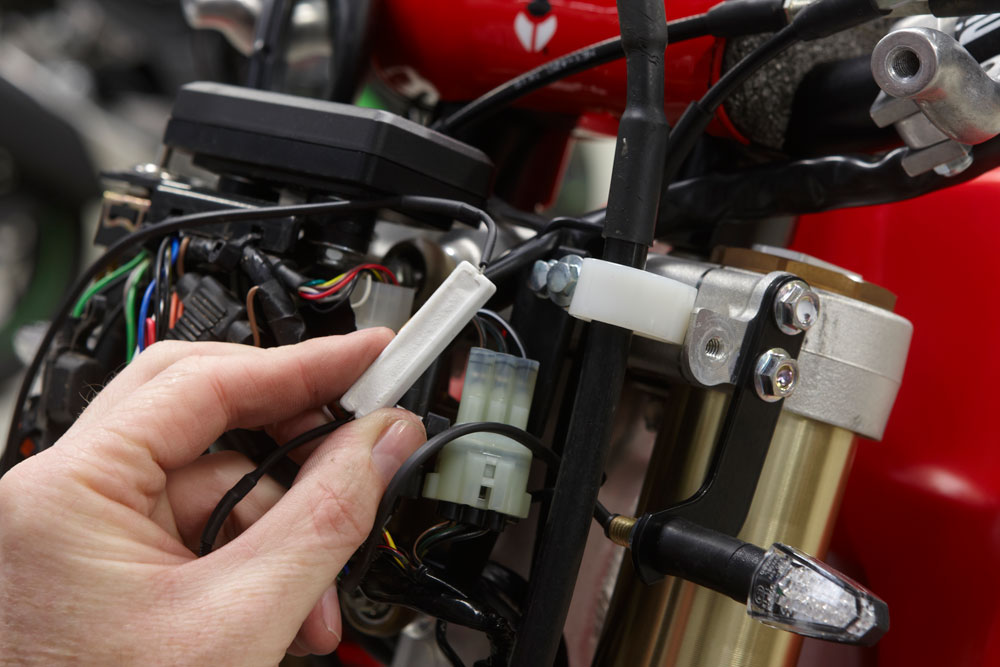
RESISTING TEMPTATION
Since these VSM heated grips offer two settings, one wire will incorporate a resistor to reduce the power to the elements. This resistor will need to find a home somewhere safe from any shocks that might crack the insulation. I use some double-sided tape to help hold it flat against the speedometer bracket and secure with some cable ties. The metal bracket helps act as a heat sink, too.
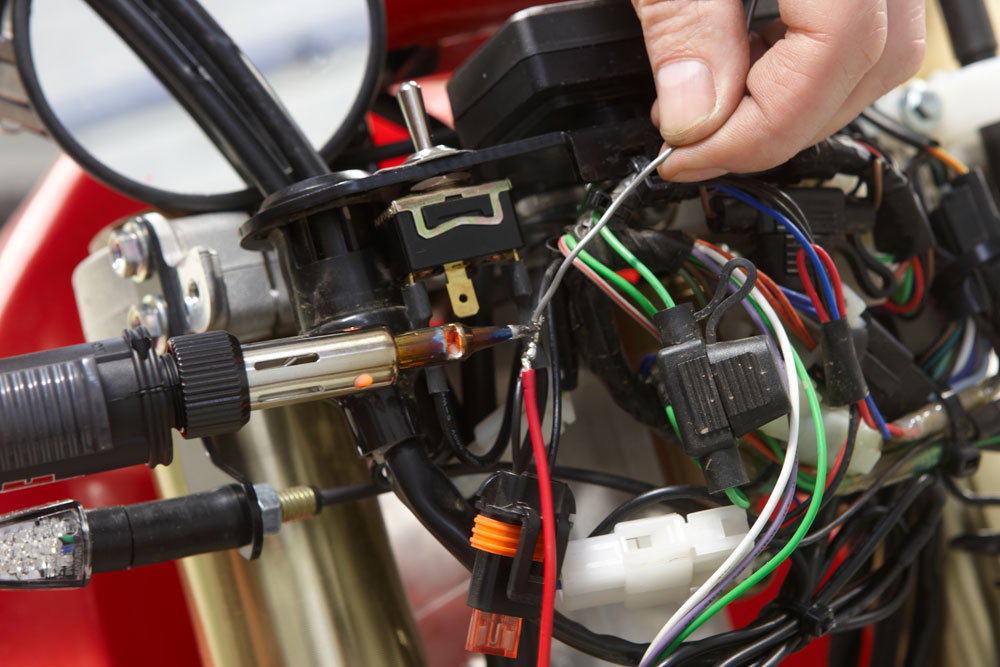
SOLDER ON
To tap into the switch power you can use commercially available scotch locks that clip onto the wires, cutting through the insulation with a small metal V that surrounds the wire. I’ve found these to be prone to failing, so I prefer the tried-and-true method of cutting back some insulation, wrapping the wire around, then soldering. Make sure you wrap well in electrical tape to prevent any shorting out of the wires should they come in contact with an earth.
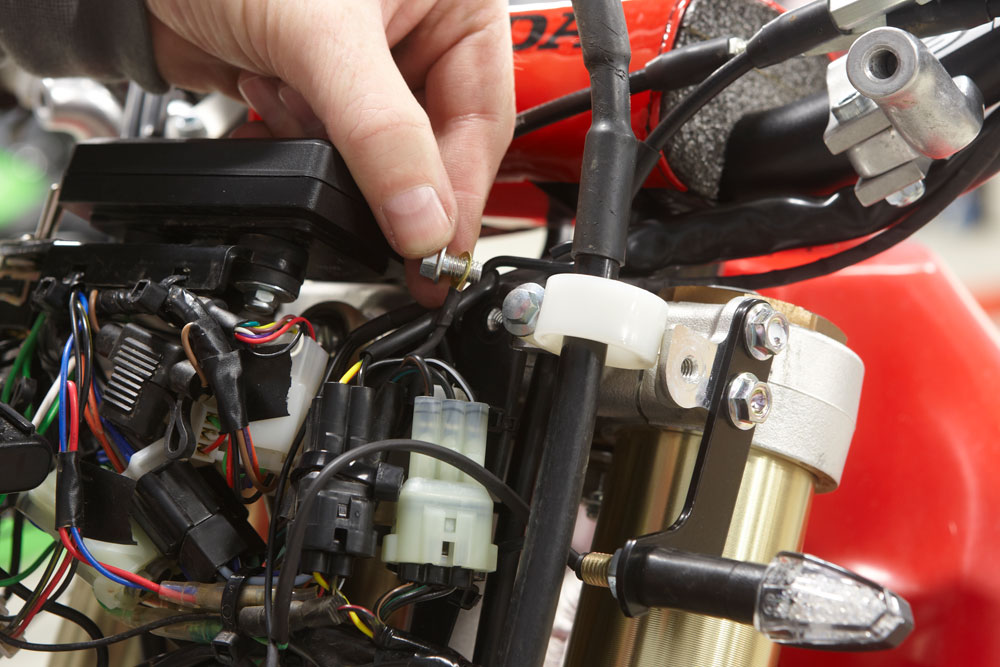
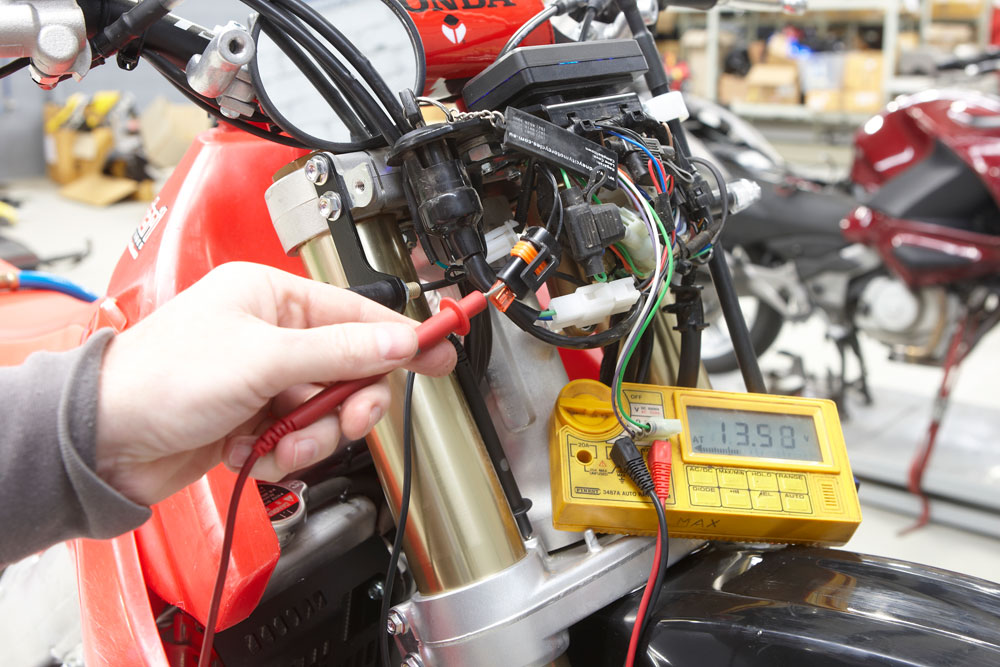
EARTH BOUND
Each element also has an earth wire that needs to be grounded to complete the electrical circuit in the element. I have crimped some brass eyelets onto each wire to make it easy to connect the wires to earth. Simply remove a suitable bolt and feed it through the eyelet before remounting. You can use a multimeter to test your earth connection back to the battery earth terminal. If your headlight bracket is rubber mounted, this won’t work.
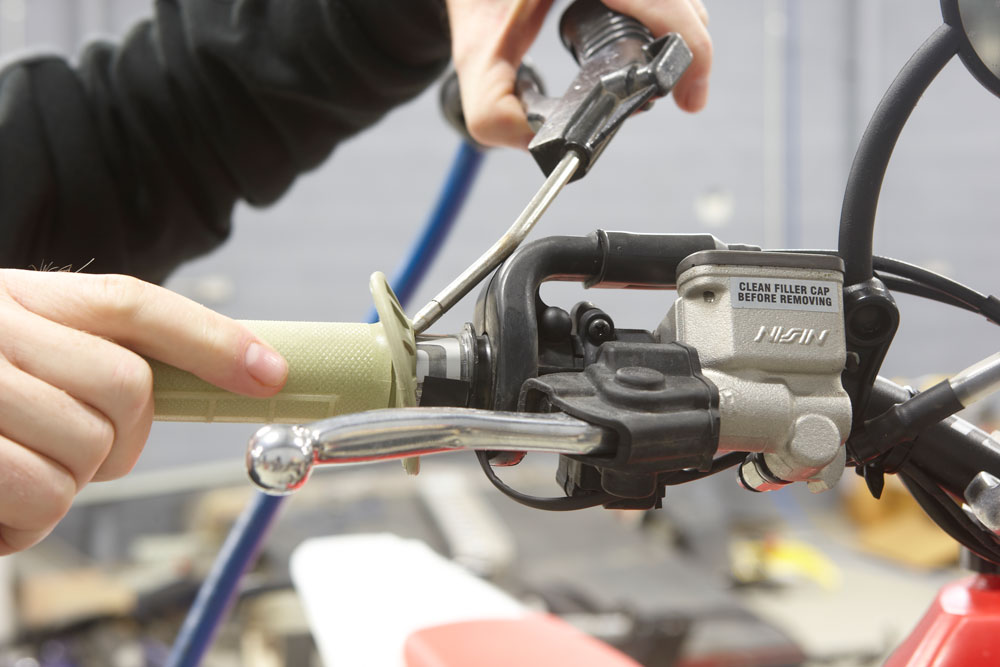
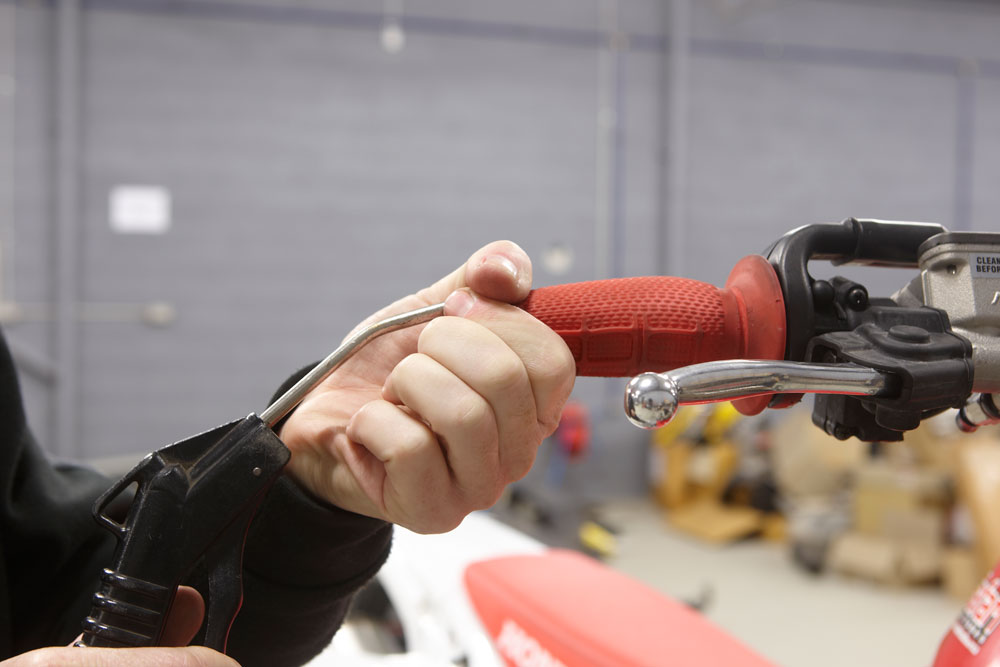
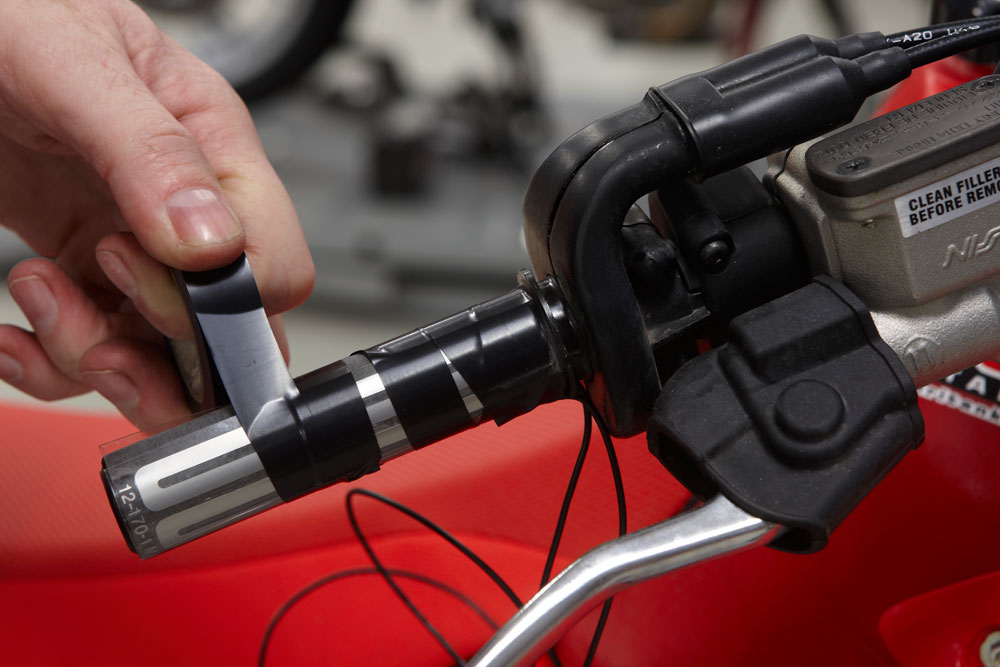
GET A GRIP
Time to fit the grips back over the elements. I remove the electrical tape, then use an air gun to blow air under the grip, expanding it as I push it over the throttle tube — just the reverse of grip removal. Next up, twist the throttle to ensure you’ve given the element wires enough free play and they don’t foul on anything. Refit the Barkbusters, tidy up the wiring with a few small cable ties and you’re ready to hit the trails, no matter how cold it is.