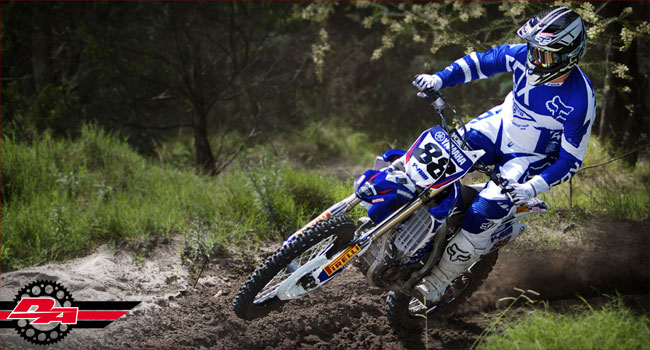
Brake pads are often overlooked when checking over your bike but they’re extremely important and, with some care, not that hard to change.
*As with all maintenance on your bike, if you’re not mechanically minded or confident, please see a professional to have your brakes attended to. Safety comes first and a mistake here could cost you dearly. But if you’re wondering what it takes to replace the brake pads … read on.
STORY & PHOTOGRAPHY MAX SULLIVAN
BACK BLEED
I prefer to work on the bike while it’s on a stand. I spin the wheel first to see how the brake system is. Any drag? Perhaps there’s a problem with the calliper. If all seems OK, continue by pushing back the brake calliper piston to allow room to fit the new brake pads. This can often be done by simply pushing the calliper firmly against the brake disc. It will move slowly, since the brake fluid needs to exit the calliper and re-enter the master cylinder via the small compensating port.
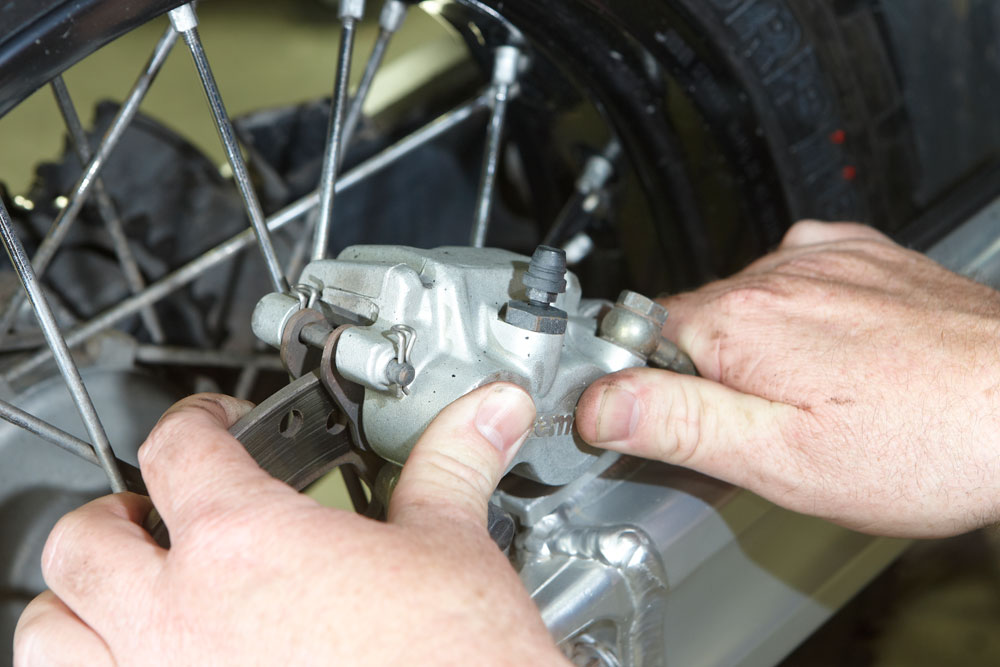
R-CLIP
If the piston(s) has/have moved all the way back into the calliper, remove the hanger pin R-clip. If the piston has not moved, you may have to remove the rear wheel so you can gain access to the calliper. Make sure the piston is clean and free of rust. You might need to spray some brake cleaner on the piston. Now you can slide two small tyre levers in between the brake pads and pull each lever in the opposite direction. This will push the piston back with more force. Again, take some time to allow the brake fluid to exit the calliper.
HANGER PIN
With both R-clips removed, slide the hanger pin out. Some hanger pins are locked into position with a small expanding ball and need a tap on one end from a pin punch to initiate the move. Other hanger pins are screwed into position and require a spanner or allen key to remove. Sometimes the anti-rattle plate puts pressure on the brake pads, so you will find it easier to push up on the end of the brake pad while you slide out the hanger pin. These pads only use one hanger pin, so they can slide straight out the back of the calliper.
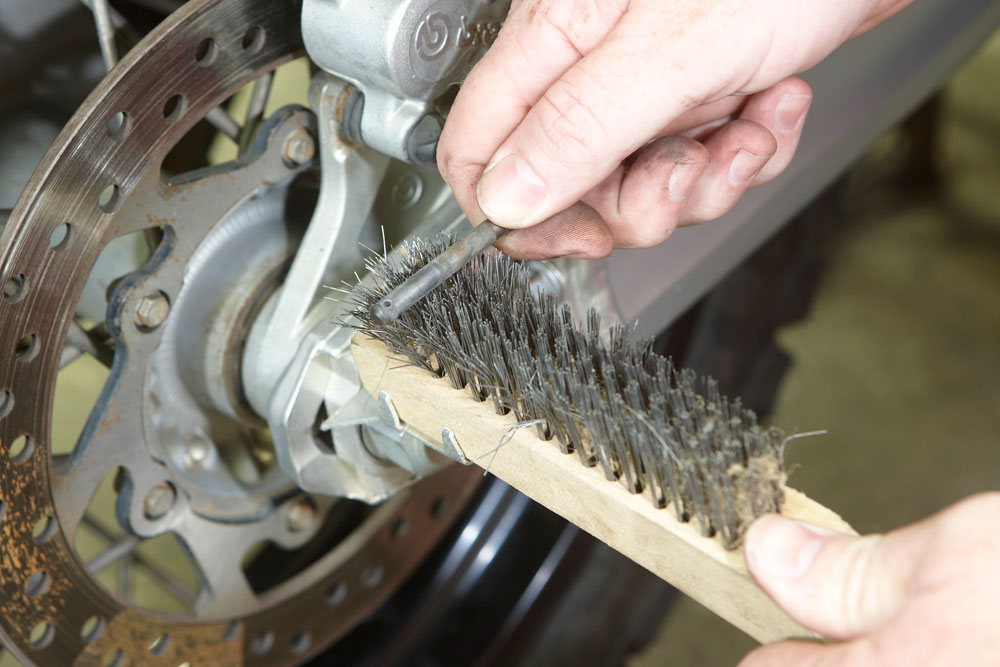
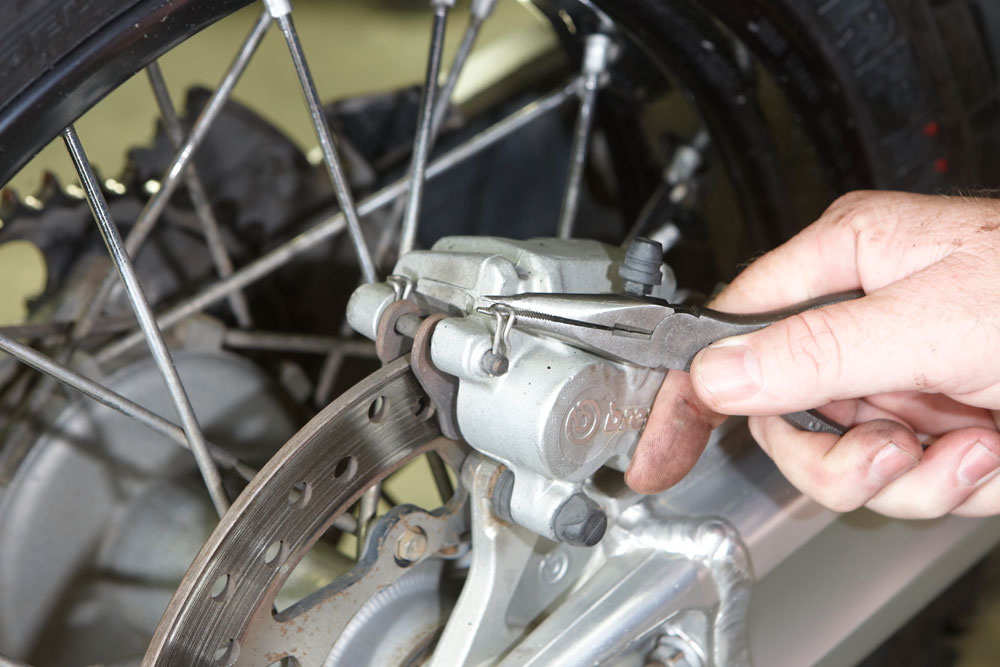
RUST FREE
Some brake callipers use two hanger pins to hold the brake pads in place. Each hanger pin needs to be cleaned and if they are rusty or they have grooves worn in them, the hanger pins should be replaced. As the calliper piston pushes on the brake pads, the pads slide over the hanger pin. Any rust or foreign material could hinder the smooth movement of the brake pads, resulting in poor performance of the brakes or uneven brake pad wear. A wire brush, either hand held or mounted on a bench grinder, is sufficient for cleaning the hanger pins.
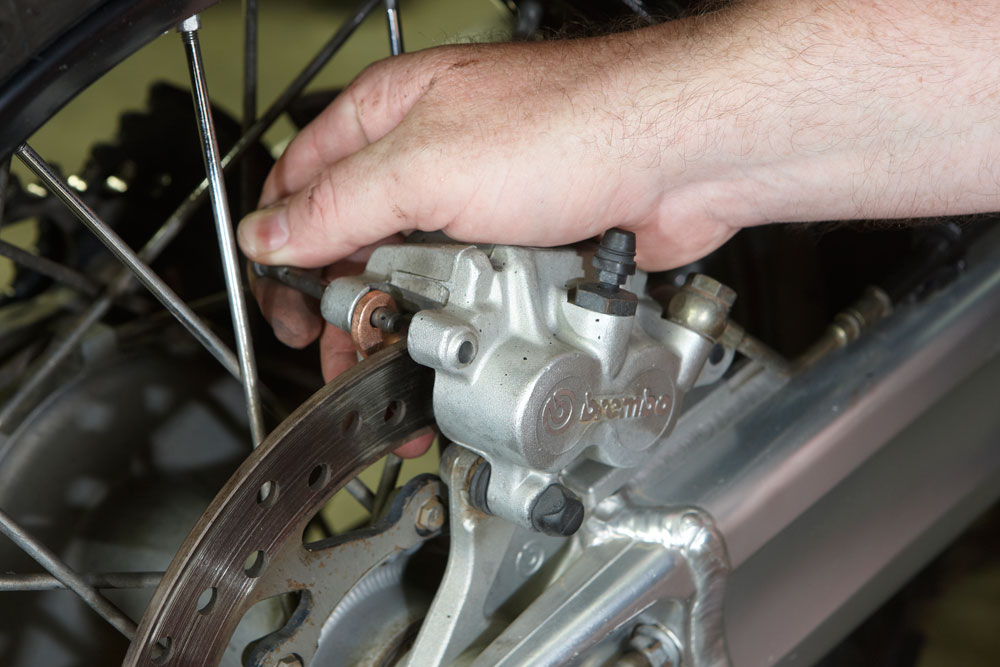
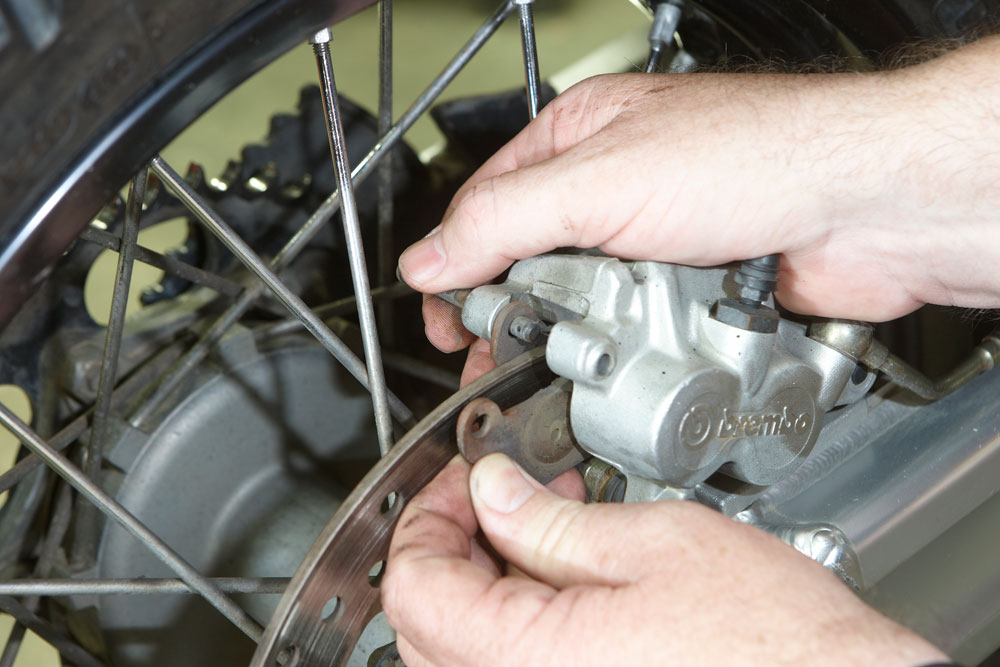
LOCATION, LOCATION
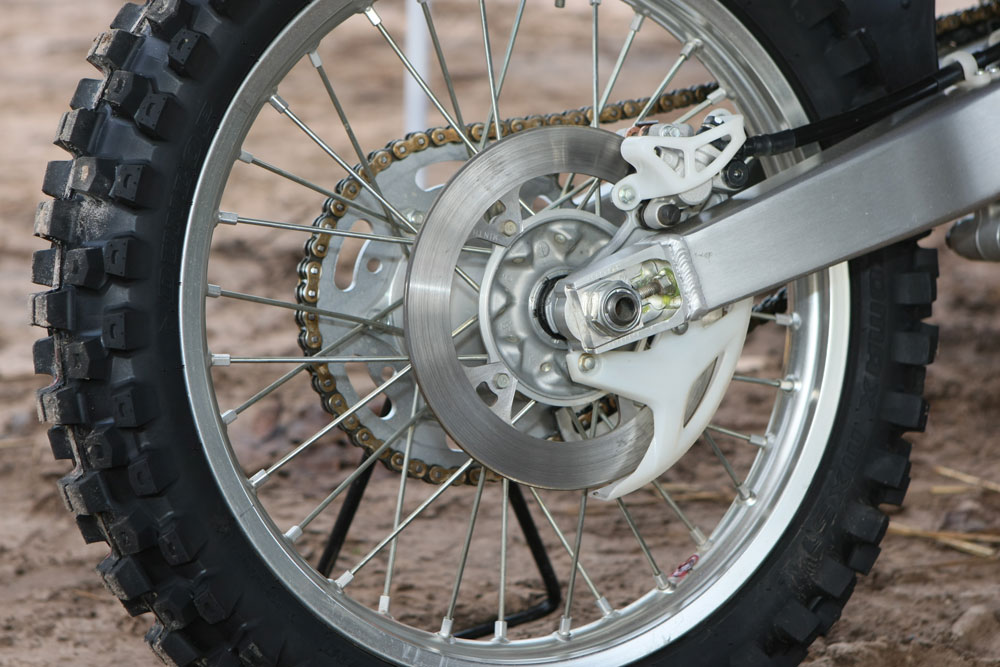
There are so many variations of brake pads, and so many different ways they locate in the calliper, it’s hard to cover them all here. This particular rear-sliding brake calliper will allow the brake pads to be removed and replaced while the calliper and wheel are still mounted on the bike. However, it’s imperative that the front of the brake pad locate in the correct section of the brake calliper. Failure to do this can lead to badly worn brake components or, worse still, no brakes at all! Always check your work.
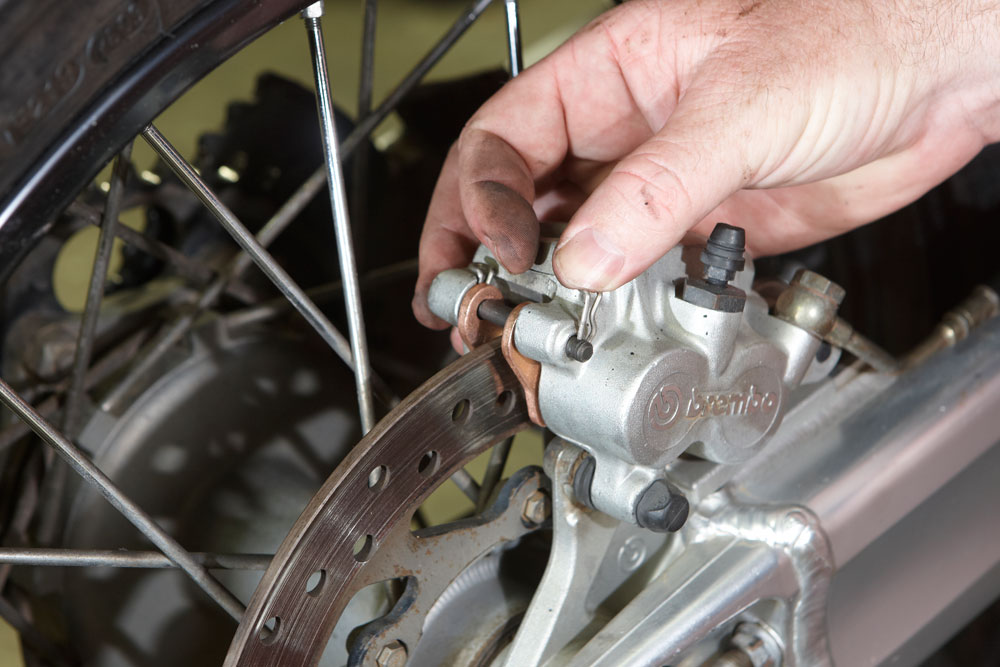
REASSEMBLE
There are generally two metal plates in a brake calliper. The front one is there to stop the brake pad wearing into the alloy brake calliper body. The second one sits above the brake pads and holds pressure on the pads, pushing them down on the hanger pin. This is called the anti-rattle spring/plate. Once both pads are fitted, visually check that the leading edge of the pads is located correctly and both are at the same height. Make sure both of these metal plates are still in place as they often fall out when the brake pads are removed. Push both R-clips into position to lock in the hanger pin.
PUMP THE BRAKES
By pushing the calliper piston back, the brake fluid has been displaced and is now in the master cylinder reservoir. Time to pump the brake pedal. Each pump of the brake pedal will occur with little resistance as the fluid pushes the calliper piston out of the calliper till the brake pads contact the brake disc. The brake lever should now be firm. I like to spin the wheel and apply the brakes a few times to ensure they stop the wheel and that the wheel spins freely. Compare the drag to the drag you felt prior to replacing the brake pads. If it is higher, perhaps there is a problem.
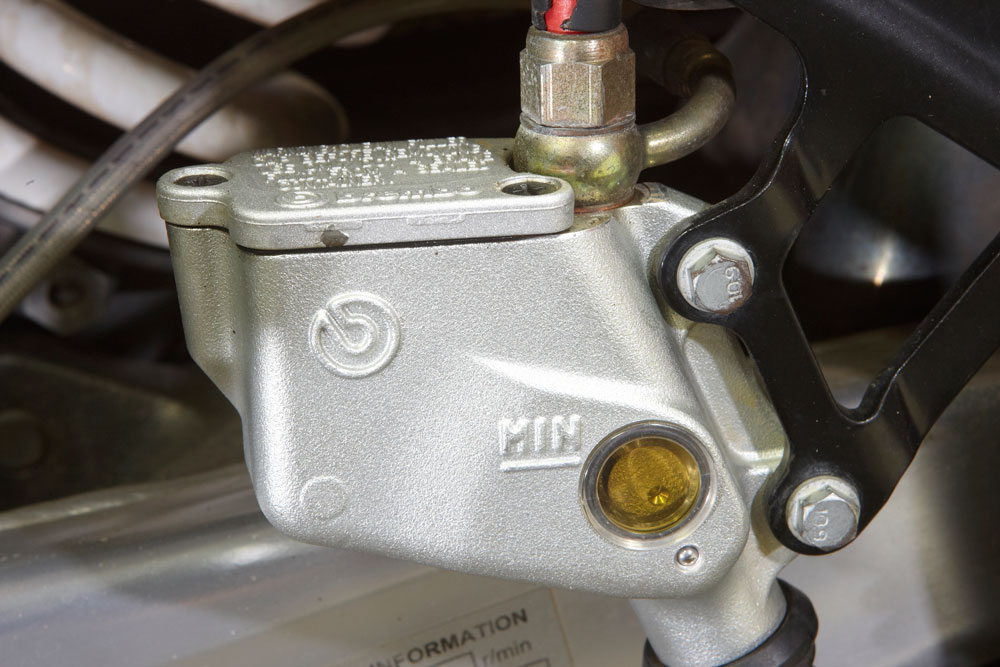
FLUID CHECK
Since the new brake pads are much thicker, the piston will not come out of the calliper as much; therefore there will be more brake fluid sitting in the reservoir. It’s vitally important to check the level to ensure the fluid isn’t higher than the recommended level. This will only occur if someone has topped up the brake fluid during a service. If the level is now too high, it may expand when hot and actually make the brakes come on! This KTM reservoir does not have a visible “high” mark on it, so it will be necessary to remove the lid to inspect the level.
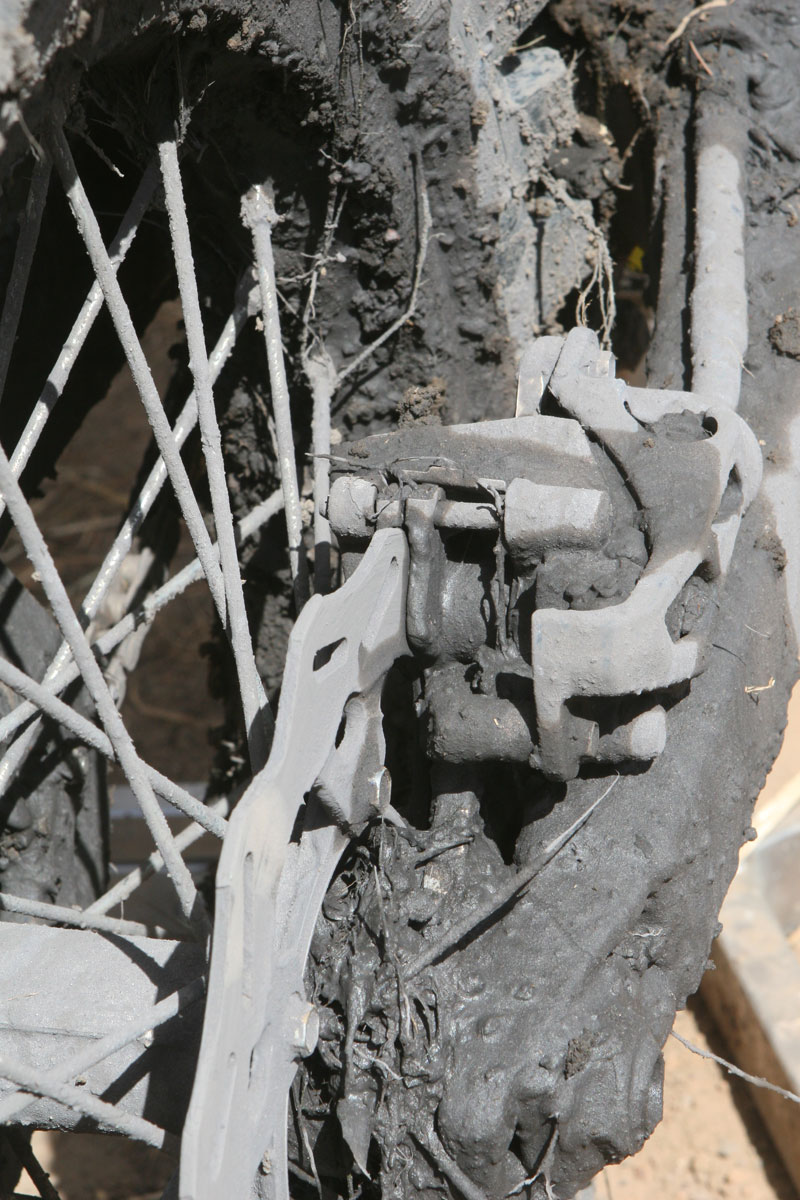
MUDDY WATERS
How long will brake pads last? How long is a piece of string? In dry dusty conditions, brake pads last quite a long time. Brake pads come in different compounds, which will give you not only a different feel but also different wear rates. Brake pads often have a groove in the middle of the friction material which doesn’t go all the way to the backing plate. When this groove is no longer visible, the pad needs replacing. Always check the brake disc as well. The brake disc will have a minimum thickness stamped on it as discs wear out, too!
SMOOTH OPERATOR
The worst conditions for brake pad wear is mud. The mud tends to get between the friction material of the brake pad and the brake disc, wearing the pads away like sandpaper. Brake pads can last less than a day in really bad conditions. Guys who regularly ride mud tend to opt for solid rear discs as the lack of vent holes seems to minimise the amount of mud that can get between the brake disc and brake pads. It’s no guarantee they will last, but worth a try …