STORY & PHOTOGRAPHY MAX SULLIVAN
If your forks are leaking, it goes without saying you need to put new oil in when you replace the seals. But don’t forget how much work off-road suspension does. Not only does all that stroke movement wear suspension components and leave contaminants in the oil; the oil actually breaks down and changes its viscosity. Even if it’s not leaking, suspension oil needs a change.
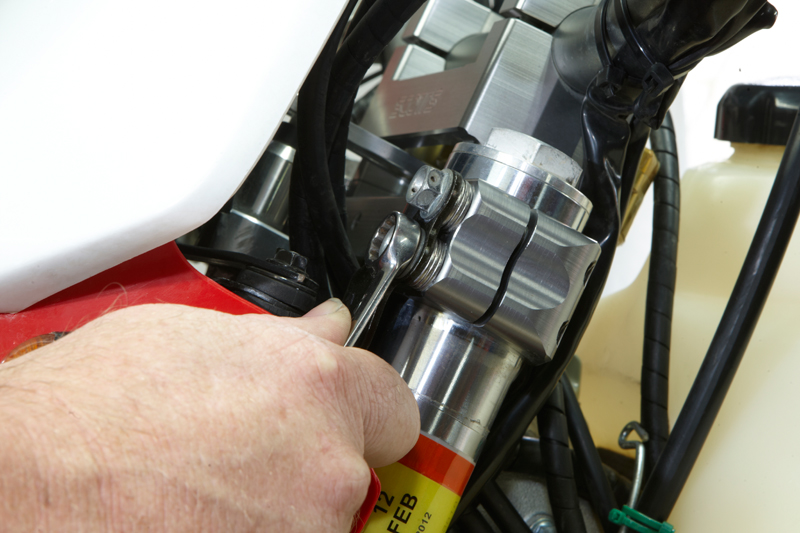
PINCH ME
The upper and lower triple clamp have pinch bolts which need to be loosened to allow the fork to slip out of the triple clamp. Start by loosening the top clamp first, but at this stage don’t loosen the bottom clamp bolts. Also, take a ruler and measure how far the forks are protruding through the clamps (if at all) so you can reassemble them how they were. Having the forks raised through the triple clamp like this will quicken the steering but take away a little bit of high-speed stability.

CRACKER NIGHT
Next up, loosen the top cap of the fork. It’s much easier to do it now while it’s firmly held by the lower triple clamp. This will save having to squeeze the fork in a vice (not recommended with any pressure) or use a rattle gun that might damage components. The top clamp pinch bolts must be loose or there’s no way you will crack this cap. It can be tightened the same way when you reassemble, but just nip it up. Once the triple clamp pinch bolts are torqued up, this cap will never loosen.
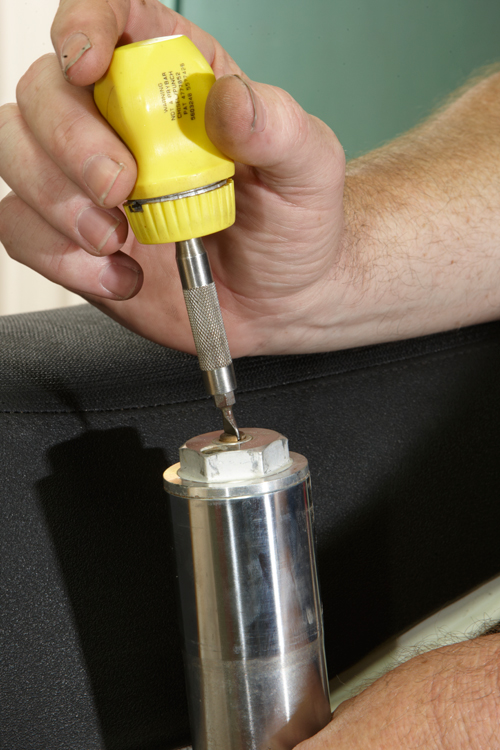
CLICK GO THE SHEARS
It’s always a good idea to back off the compression and rebound clickers when changing fork seals and/or oil. Now is a good time to check the adjustment to see if any of your mates have been messing with you at the track! Count the number of clicks in as you turn the adjuster clockwise. Note the number, then count the number of clicks from fully seated (hard) out to fully open (soft) and note the number. Now you can put them back exactly where they were before you dismantled the forks.
CHARLIE & BOOTS
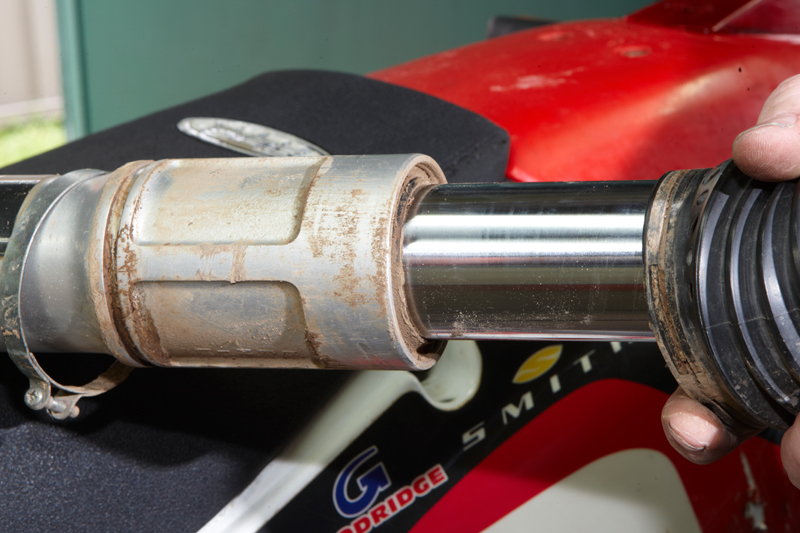
Old-school conventional forks, such as these XR650 forks, often have gaiters or boots over them. Even though we’re just changing the oil to freshen things up, it’s good practice to slide the boots up, inspect the seals and clean out any foreign material. Make sure the dust seals are in good condition as well. Also inspect the fork stanchions for any chips that might be lurking, ready to cut through your fork seals. Any minor damage can often be cleaned up with a very fine oil stone.
TEA & DAMPER
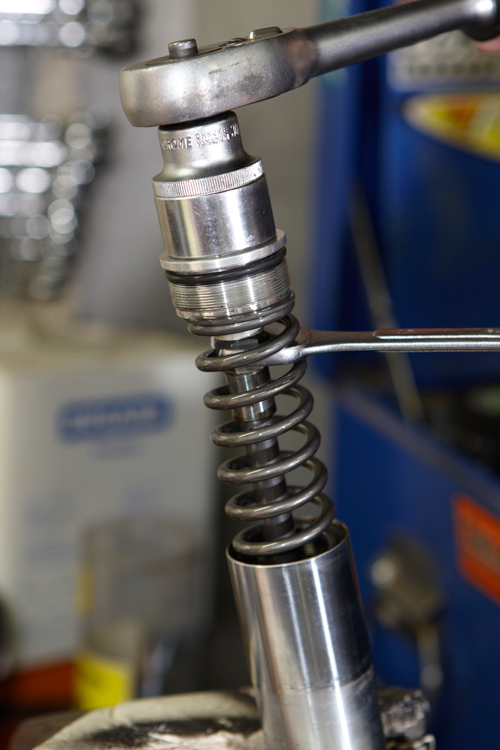
To remove the spring, you’ll need to take the top cap off the damper rod. Use a 17mm spanner to hold the lock nut and loosen the top cap. The cap will then unscrew from the damper rod. Slide out the inner tube, then remove the fork spring. The spring can be measured for its free length to see if it has worn over the years. The damper rod will fall back into the fork but is easy to retrieve, so don’t panic.
OIL SLICK
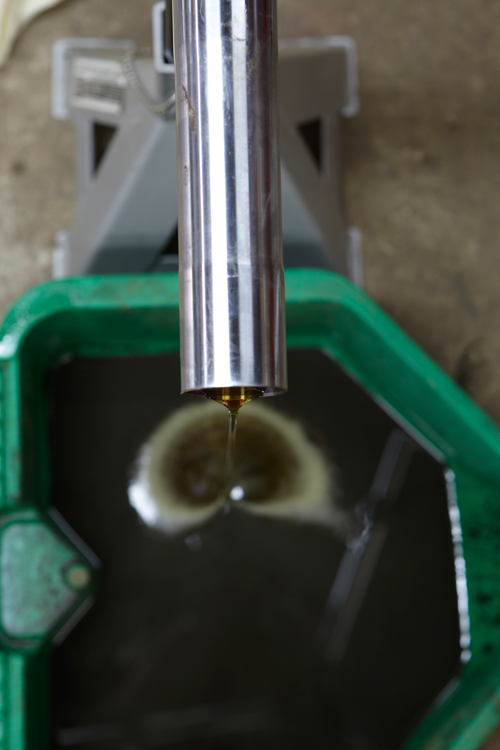
If the suspension has done more work than you thought, the oil will tend to break down in the forks and will not only look black in colour but also stink! The first fork we drained had some very rank oil in it while the second one wasn’t as bad — still overdue for an oil change but not nearly as bad as the first. Small metal particles from the spring and internals may also be found in the fork oil. While a full dismantling of the forks is the best thing to do, a flush like this is certainly an improvement.
GIVE IT A SPRAY
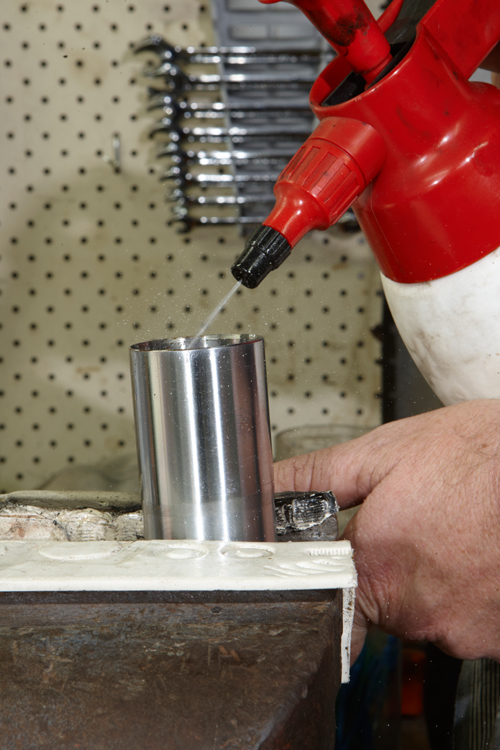
Once you have drained all the old fork oil and pumped the damper rod to remove all the oil you can, it’s time to flush it out. Use some brake cleaner or Shellite to flush out the remainder of the old oil. Pump the damper rod several times to work it through the chamber. Tip out the contaminated cleaning fluid and pump the damper rod till all fluid is expelled. Leave the fork upside down to completely drain and dry.
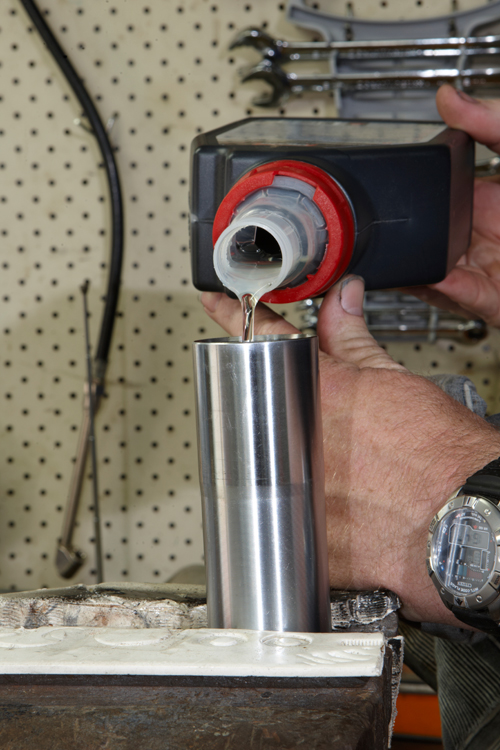
GOOD OIL
With the fork clean and completely dry, it’s time to add some fresh fork oil. Refer to your workshop manual to find out what weight oil you should use. Most manuals will also give you a quantity of oil in millilitres as well as a fork oil level. We will set the fork oil level shortly so, for now, fill the fork up to about 100mm below the top, then gently pump the fork up and down to circulate the oil and release air bubbles.
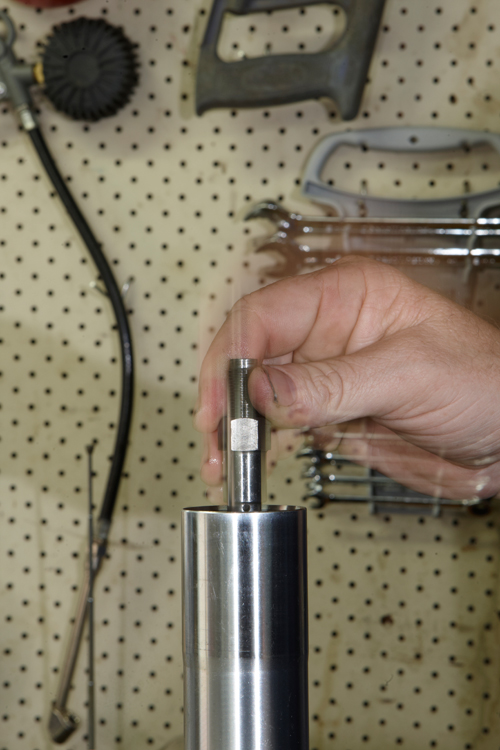
HAND PUMP
The new fork oil now needs to find its way into the fork damper. To make sure it does, pull and push the fork damper rod through the entire length of its stroke. If there’s air inside, you’ll feel it when all of a sudden, near the end of the stroke, there’s very little resistance. Keep pumping till there’s resistance throughout the entire stroke of the damper rod. The oil level may need topping up as you do this, since oil has now been drawn into the damper rod.
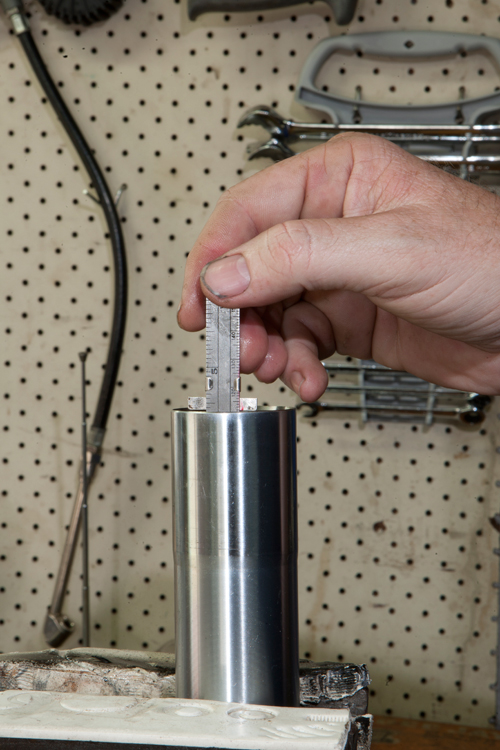
MIND THE GAP
Forks on smaller bikes often list oil quantity only. If this is the case, just pour in the required amount. If fork oil level is listed, this is far more accurate. It’s also known as air gap, since you’re measuring the gap between the top of the oil and the top of the fork, and is always measured with the fork fully compressed, with spring removed. Once this is set, simply refit the fork spring and follow the dismantle procedure in reverse. You’ll be out soaking up the big hits in no time!