
The slow wheelie is not only good fun but a great skills exercise, too
STORY SHANE BOOTH PHOTOGRAPHY MATT BERNARD
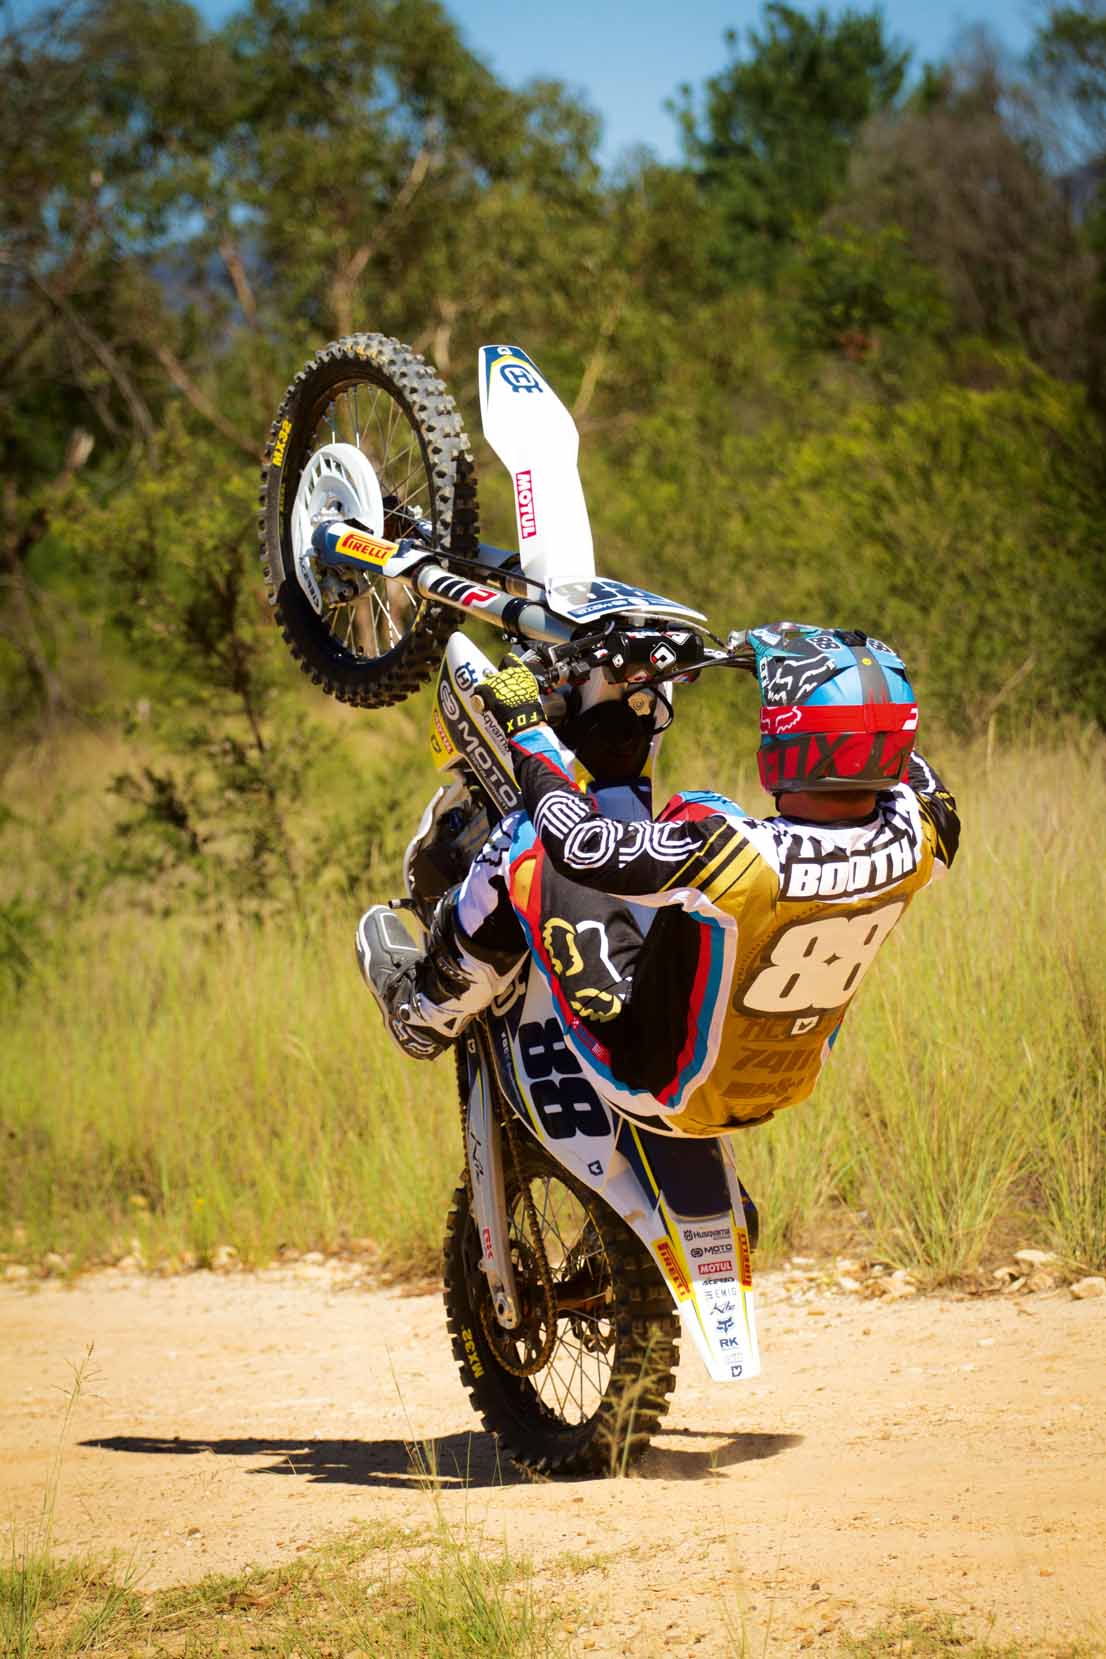
BODY POSITION
Where you place yourself on the bike is important and will allow you to reach the controls you need to pull off a successful wheelie. You’ll need to sit all the way to the rear of the seat for a couple of reasons. The first is to help take weight from the front and add it to the rear of the bike — this increases traction and makes the front wheel a little easier to get off the ground. The second, and more important, is that in this position you’ll notice it allows you to keep your foot on the footpeg and pivot it to use the rear brake pedal; the rear brake pedal is what stops you from flipping your bike. So, no more wheelies sitting up on the tank. Once you have the body position sorted, it’s time to work through the three stages.
STAGE 1
Here’s how you learn how much throttle and clutch is required to get the front wheel off the ground. Ride along in the correct position on the bike, slow to almost a stop then use a small burst of throttle and clutch to pop the front wheel off the ground. As soon as the front wheel leaves the ground, pull the clutch back in: this will disconnect the drive to the rear wheel and drop the front wheel back to the ground. You don’t need a handful of throttle for this; start with only a small amount of throttle and build up to the amount needed to get the front wheel up. Another tip that helps is to actually come to a complete stop for a split second with the front brake before you pop the throttle and clutch. This will compress the forks slightly and if you time the power release as they rebound it will help you get the front wheel up.
STAGE 2
Once you know how much throttle and clutch is required to get the front wheel up, it’s time to train yourself to use the rear brake. This is by far the most important stage of learning the slow wheelie. The natural reaction of most riders to the front wheel coming up too high is to drop their feet off and run behind the bike. You need to reprogram yourself to go to the rear brake instead and trust it will do the job of bringing the front wheel back to the ground. So, this is all about popping the front wheel off the ground then pulling the clutch in and hitting the rear brake. Get a feel for it and, as you do, start bringing the front wheel up higher before you pull the clutch in and stab the rear brake. Take your time with this stage and practise it until the rear brake becomes your natural reaction to a high front wheel. If you do, your chances of flipping will decrease greatly.
STAGE 3
Now it’s time to get comfortable riding your bike with the front wheel up so high it’s at the balance point. That’s why you can carry such a high wheelie at such a slow speed. This is not a power wheelie but rather all about balance and control. Once you get the front wheel up to the balance point you then have to try to keep it there with a combination of throttle, clutch and rear brake. If it comes up too high you need to ride a very slight amount of rear brake; if it starts to drop you’ll have to add a tiny bit of throttle and clutch. That’s what it’s all about: just keeping the front wheel at the balance point and carrying it along.