Lighter components are what we desire, but are they really worth it?
STORY & PHOTOGRAPHY MAX SULLIVAN
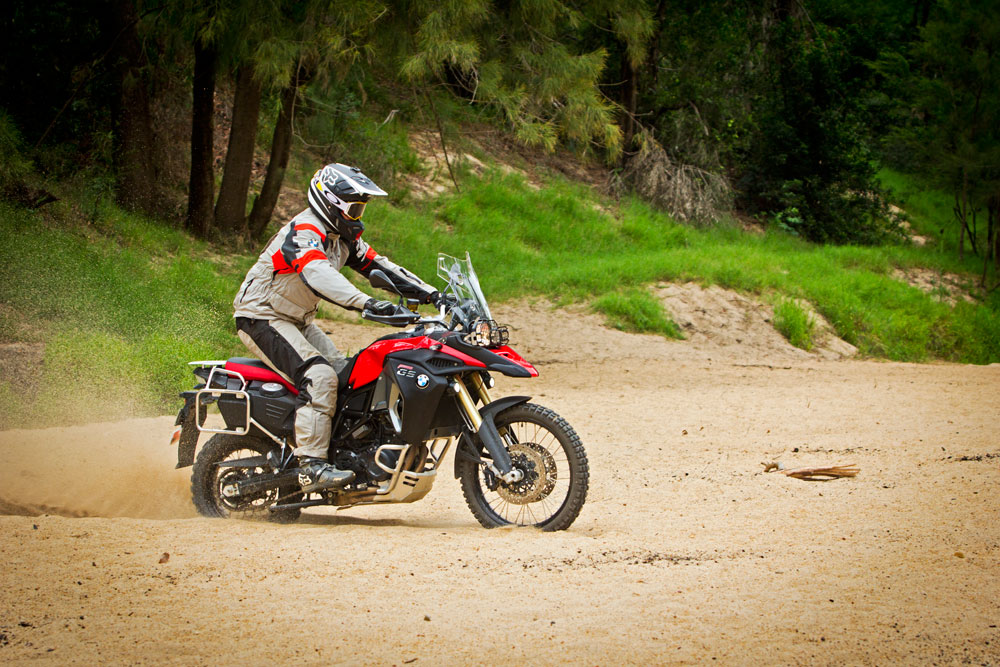
Aluminium alloy, carbon fibre and magnesium components are tricky bits of gear. They reduce our bike’s weight substantially but that does come at a price. While most of these are relatively strong, they’re not really designed to take an impact likely to happen in an off-road environment. Well, it’s bound to happen with me at the controls!
CRASH BANG
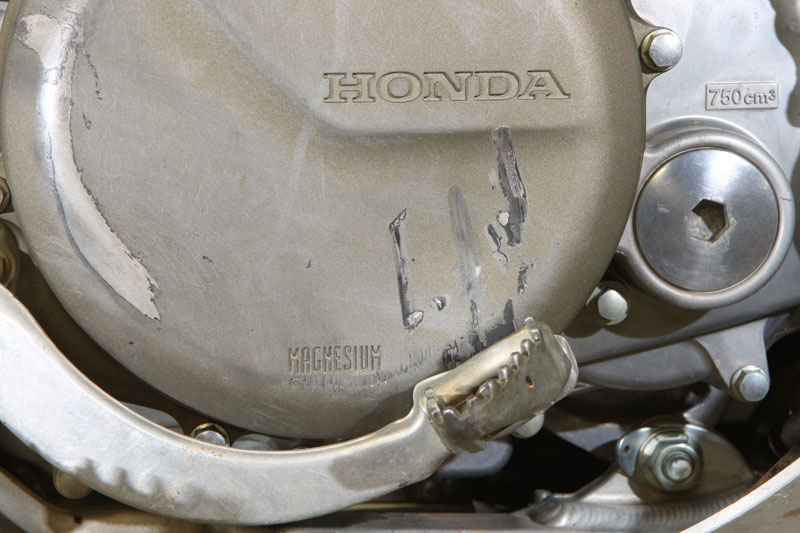
Dare I say it? This type of damage is typical after a fall on the right-hand side. The brake lever strikes a rock and is pushed upwards and in toward the clutch cover. The brake snake has snapped off and in fact the lever has bent as high as the marks in the cover. The lever was sort of straightened out on the trail to make the ride home more predictable. If you think the cover is being replaced because of a few scratches, keep reading! We even removed the cover on the trail to see what internal damage, if any, had occurred.
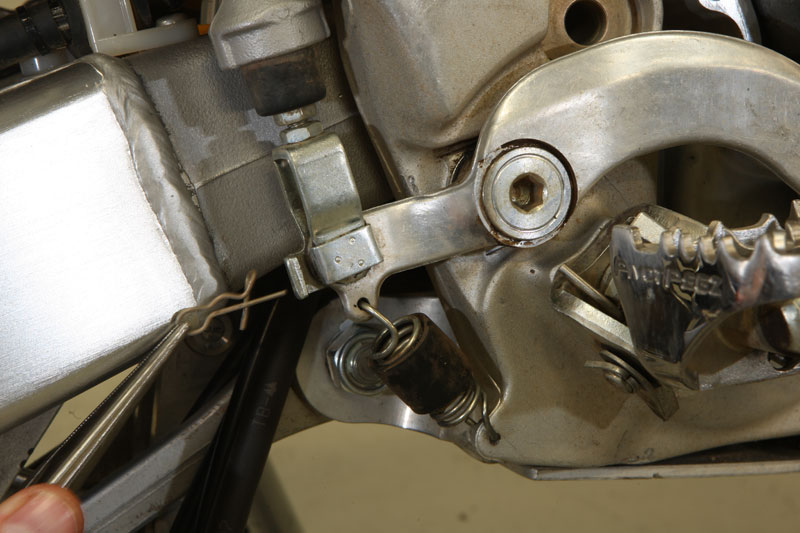
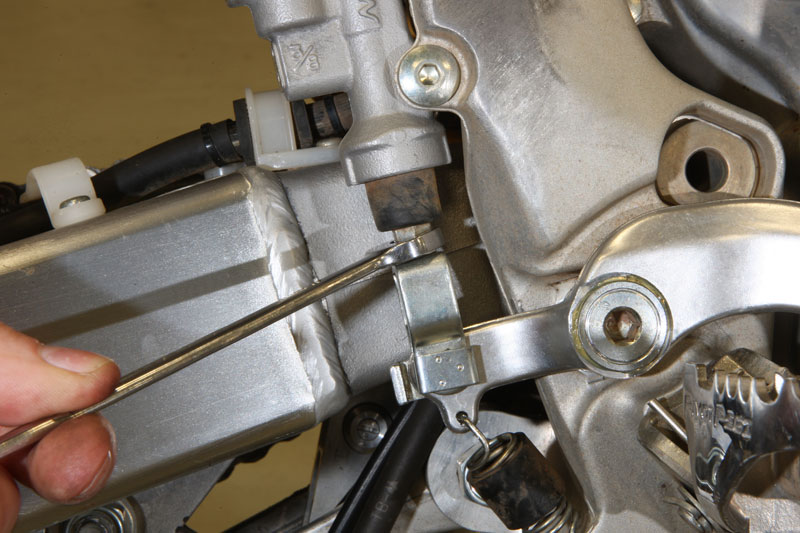
HIDDEN DANGER
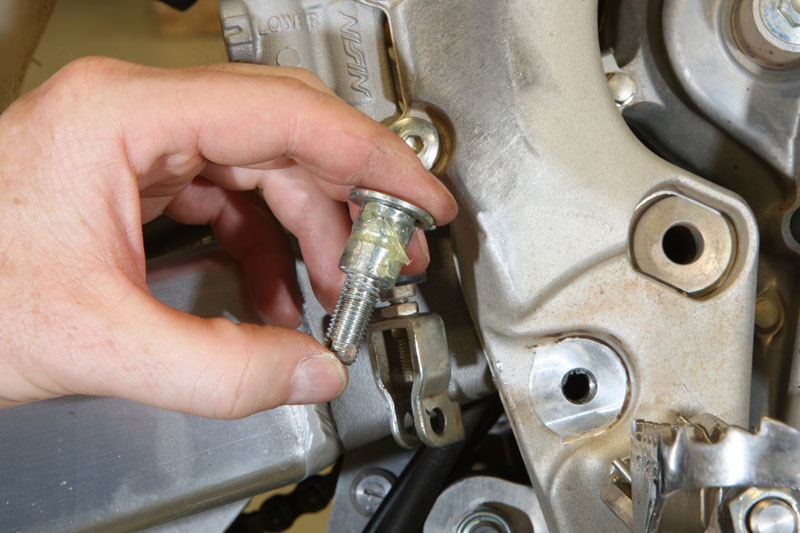
The rear brake lever is going to be replaced anyway, but removing the lever will give clear access to the outer clutch cover. Some brake pivot bolts are simply screwed into the frame and Loctite is used to secure the pivot bolt. Others, like this one, have either a split pin or R-clip on the inside of the frame, going through the end of the pivot bolt to stop it from coming loose. If you don’t remember to remove this clip or split pin, you’ll damage the threads as well as make life very difficult for yourself. You’ll also need to remove the split pin holding the lever to the end of the master cylinder.
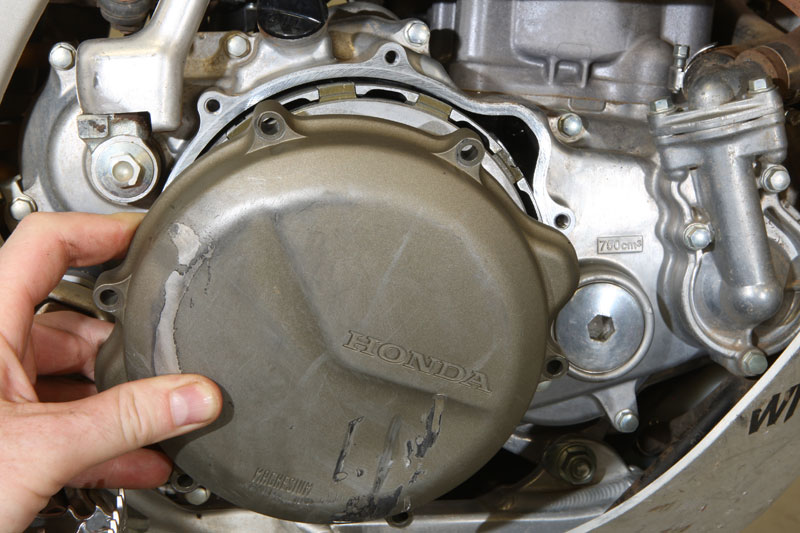
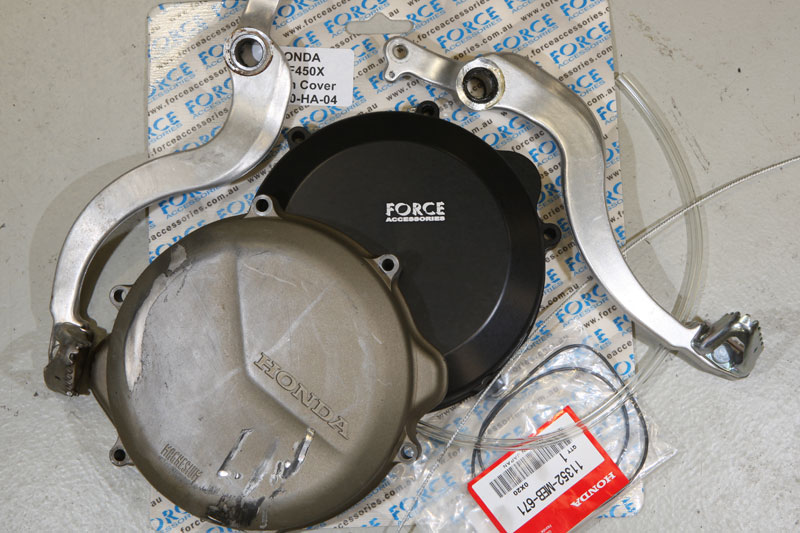
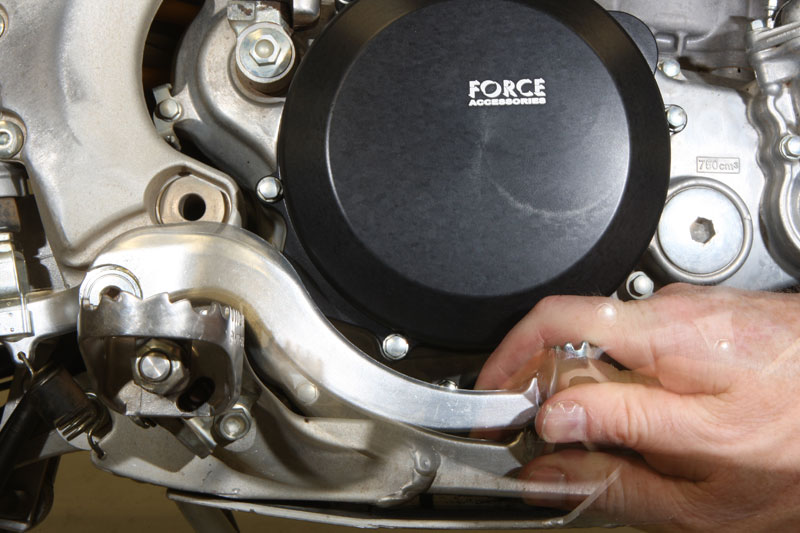
ON THE OUTER
One good feature of this bike is the separate outer clutch cover. This allows quick access to the clutch without disturbing the water pump, cooling system and primary drive. Remove all the 6mm bolts around the cover and lift it off. The gearbox oil level may be high enough to leak out, so it pays to change the gear box oil while you’re at it. If changing the oil is not an option, lean the bike over or lay it carefully on its side before removing the outer clutch cover.

GOT A CHIP, BRO?
Now you can see why the cover was removed on the trail for inspection and is now being replaced. Despite not having any cracks on the outside of the cover, the magnesium has cracked internally and, in fact, dropped a small piece. This was found on my first inspection and removed for the trip home. The clutch boss has been rubbing on the outer cover each time the clutch was engaged. Fitting a billet cover should stop this happening in the future. Then again, if I hadn’t have crashed, it wouldn’t have happened, either!

NO LEAKS
This outer clutch cover, like many on the market, uses an-O ring instead of a gasket. While the O-rings can often be used again, you usually find them slightly swollen when you remove them from the cover. You might struggle to fit the now slightly larger O-ring into the groove of the new cover. Save yourself the stress and have a new O-rings handy when you fit the new cover. Don’t use solvents or cleaning agents near the O-ring as they may have an adverse affect.
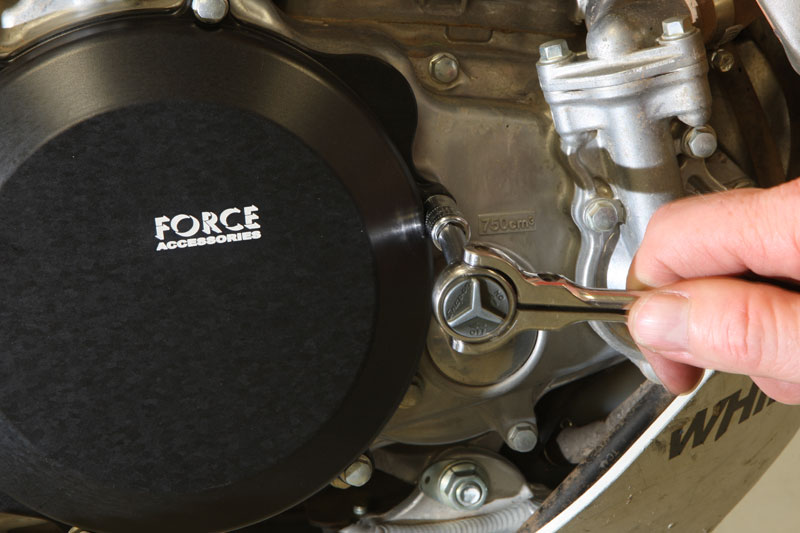
DON’T FORCE IT
With the new O-ring neatly in place, fit the new billet cover onto the inner clutch cover. Fit all the 6mm bolts and tighten in a criss-cross pattern. Since the cover is using an O-ring to seal, there’s no need to over-tighten the bolts. Once the alloy cover has seated against the inner cover, the O-ring does the sealing. If oil does happen to leak out, check that the bolts are firm, but unless they’re loose the O-ring will simply need replacing. If you have lost any gear box oil, don’t forget to change it, or at least top up.
ALL LUBED UP
The new brake lever may or may not come with seals. Make sure these are replaced if your lever runs them. Clean off the old lube from the pivot bolt and lube up with some new grease. Waterproof grease is ideal to use here, as we all get a little lazy and tend not to lube this pivot as often as we should. Don’t forget to use a new split pin in the master cylinder rod pin. Never reuse split pins as they will fatigue, break and fall out!
FINE TUNE
To make the ride home with the bent lever, I had also backed off the adjustment at the master cylinder. Now is the time to readjust the lever height and fine-tune it to exactly where I want it. Make sure you sit on the bike and check the lever position. It even pays to wear your dirtbike boots so you don’t end up with a lever too high that your foot rests on, prematurely wearing out your brakes. Don’t forget to tighten the lock nut after you finish your adjustment.
DOUBLE CHECK
Once everything is back together and ready to go, double-check your work. It’s a good idea to push the rear brake caliper back on the piston, then pump the brake lever a few times. This checks that everything is working. It might sound simple enough, but the pivot bolt runs a washer between the lever and the frame. I’ve seen guys leave this washer out (it rolled away on the floor!) and then the brake lever locks against the frame. Best to find your mistake before the first corner.
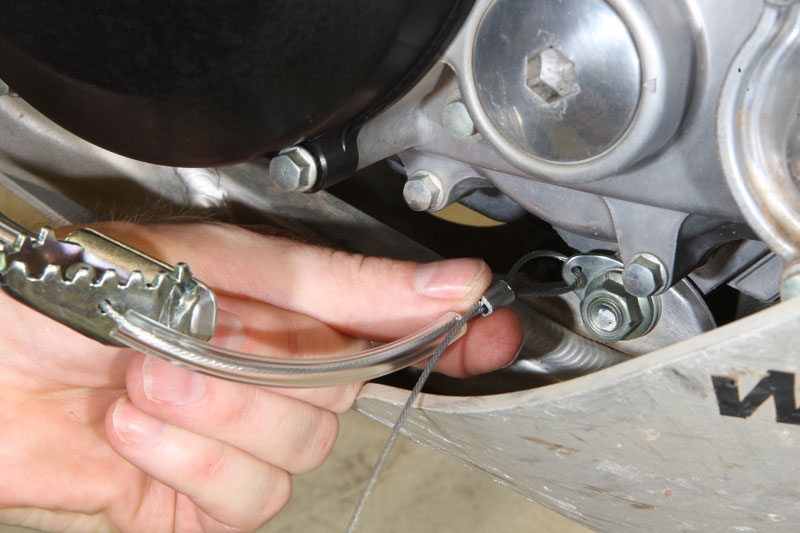
SNAKE BRAKE
A new brake snake is the last thing to fit. These stop branches, long grass etc from sliding between the rear brake lever and the frame. This build-up can cause havoc with your brake operation. The brake snake can also lessen the likelihood of the lever bending so much that it snaps off. In my case, the snake had broken but at least the lever was still intact to ride home with. Feed the new one through the holes and leave enough slack that the lever can operate in its full stroke. Use multigrips to crimp off the eyelet and lock it in position.