Sticking on your fresh decals can be a scary task if you’ve never done it before, but never fear — here are some tricks and tips to help you get the job done without going grey.
PREPARATION IS KEY
Have a neat and tidy area with plenty of space. Ensure the bench is clean and not covered in anything that will cause your graphics to fail to stick, such as oil or dirt.
CLEAN UP
Ensure your plastics are clean and free of any glue. Even if they are brand-new plastics, it’s important to clean them before sticking your decals on. The best to clean with Isopropyl alcohol. Also, make sure there is nothing on the back of the plastics. If you touch it and then the decals, you’ll affect the way they stick to the plastic.
CHECK THEY FIT
There’s no point sticking on a decal and getting almost to the end only to realise it doesn’t fit. Check that the graphics will in fact fit; if they don’t, you may be able to return them if they are from a bike store. Check that you haven’t given the custom company the wrong model to work on. They may have even made a simple mistake. It happens.
GET IT WET
Depending on who you ask, you will be recommended to stick on wet or dry. I’ve always found wet easier. If you’re fitting wet and don’t have access to an application fluid, put a very small drop of dish washing liquid in a spray bottle of water. Spray a very fine mist on both the plastic and the sticky side of the decal with the moisture, then apply. You can slide it around until you’re happy with the fit of the decal.
WORK IT WHEN WET
When you’re happy with where it’s placed, work the moisture from the middle out, forcing as much of the water out from under the decal and doing your best not to trap any moisture. It’s best to use an applicator or squeegee to do this — these are available from sign supply stores or your local sign writer may be able to sell you one. Otherwise, a thick card like a credit card and a rag will work OK.
EVAPORATE
Once you have as much moisture as possible out, leave them in the sun or even in a car with the doors closed for an hour or so to help the moisture evaporate. Once that’s done, get them back on the bench and work any remaining moisture out. Use the heat gun to help mold the decal to the right shape.
DRY IS THE GO
If you’re sticking on dry, everything as regards preparation stays the same. Ensure your graphic is aligned and then peel back one section, preferably a corner, and apply. Slowly remove more backing paper, working along the center of the decal. Starting in the middle and working your way out is the best way to work here.
WORK IT OUT
With the center applied, begin to push the decal down towards the edge of the plastics. Working towards the edge will help any air vacate from under the decal. If it begins to bunch up a little, apply some heat to help it settle and continue. Don’t get it too hot as it will stretch the decal or burn a hole in it.
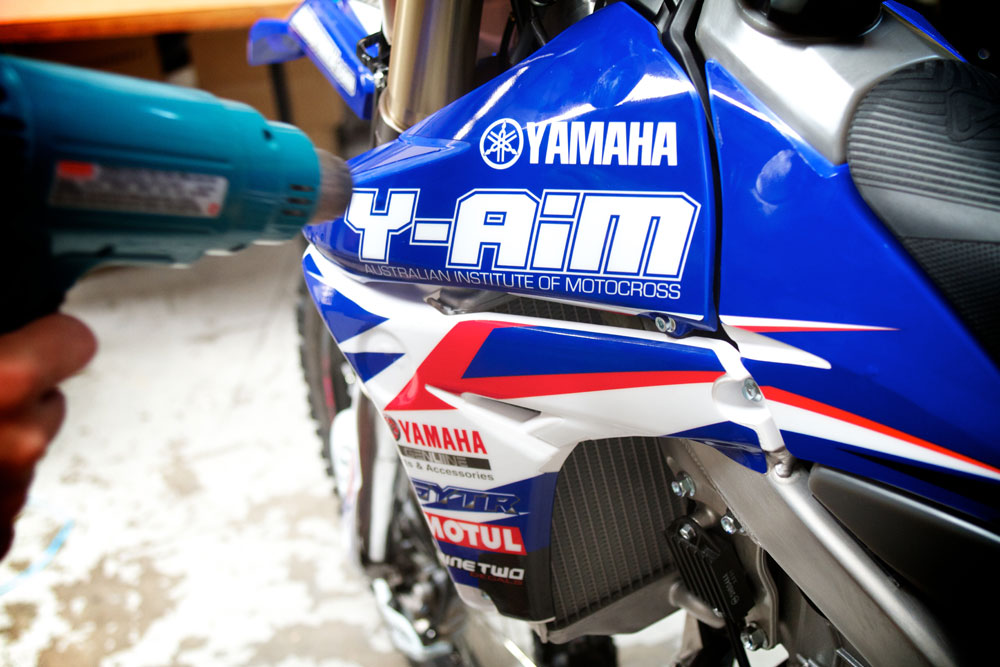
HEAT IT UP
With your decal fully applied, give it a good dose of heat all over. Ensure you don’t keep the heat gun in one particular place for a long period; keep the gun waving over the decal. If you keep it in the one spot you risk burning holes in your new decals.
NOW WAIT
Once your decals have cooled, trim off any excess that may be overhanging. If you go and hit the track straight after sticking your decals on they won’t last. The adhesives need a bit of time, especially if applied wet, to bond to the plastics. Try to leave it at least a couple of days to ensure your graphics last.
TOOLS OF THE TRADE:
HEATGUN
APPLICATOR
APPLICATION FLUID
STANLEY KNIFE
RAGS
ISOPROPYL ALOHOL