SETTING YOUR RIDE HEIGHT
When it comes to setting up a bike to suit a rider, suspension is often overlooked. With a few simple tools, adjusting your rear ride height is relatively easy and can make a world of difference to how the bike feels and handles.
STORY & PHOTOGRAPHY MAX SULLIVAN
STAND UP
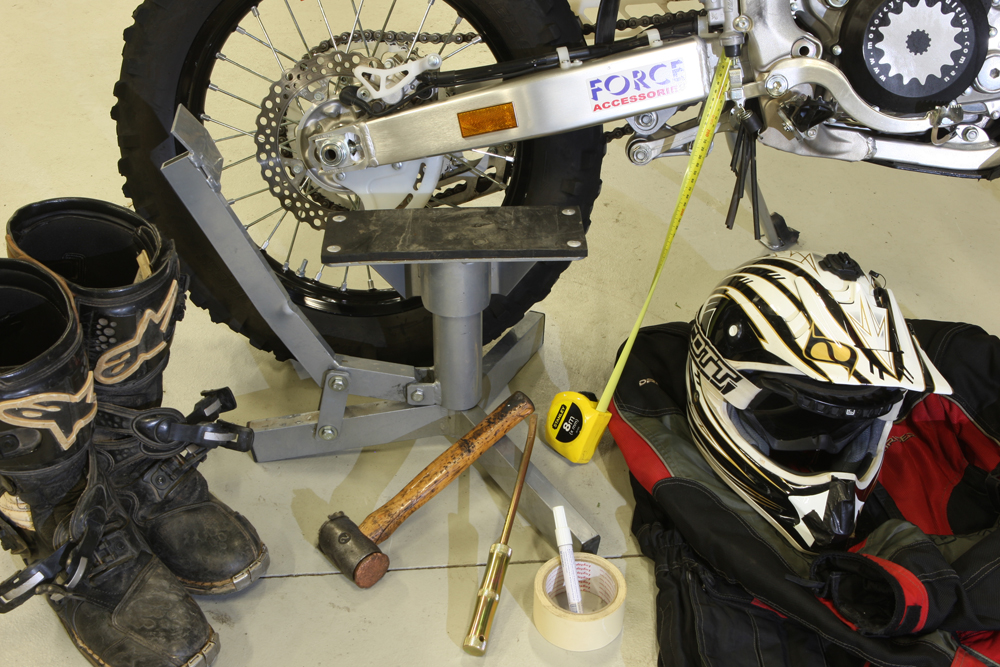
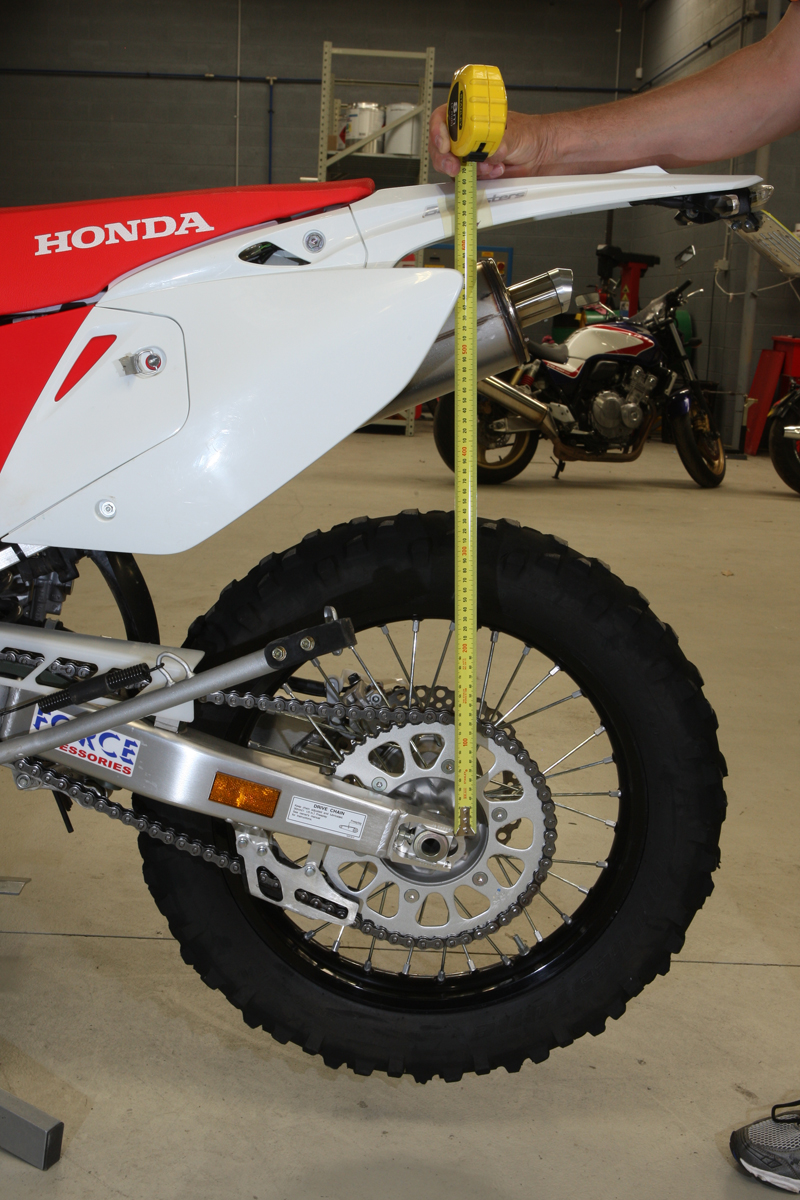
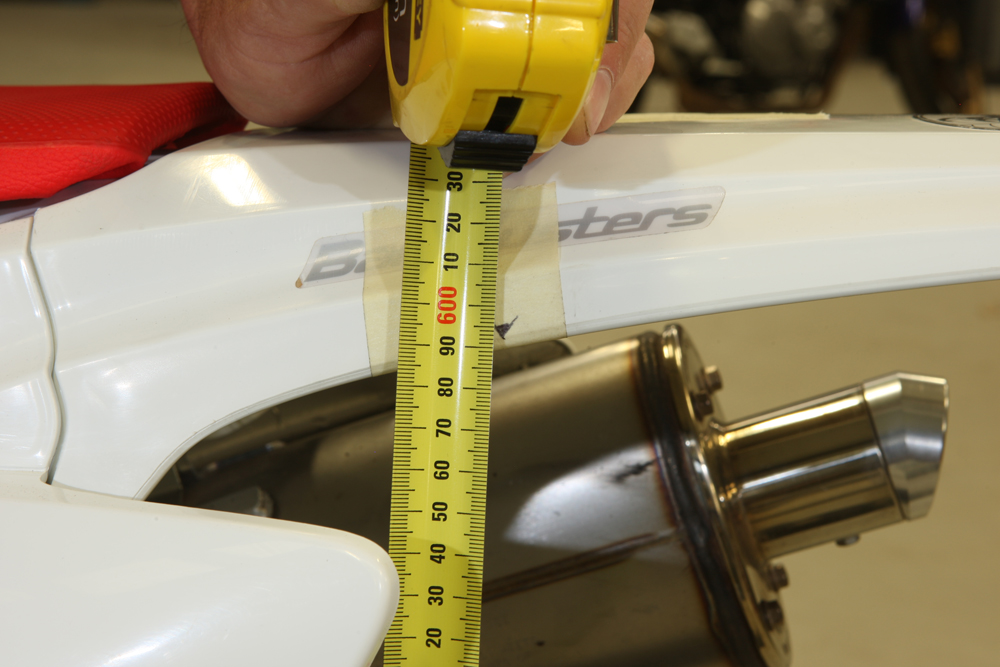
First up, you need a starting point: a measurement taken with the bike on a race stand, with the rear wheel off the ground, so the rear suspension is fully extended. You might use a piece of masking tape or such to mark a point on the rear guard. Now use a tape measure (specific sag-measuring rulers are available) to measure the distance from the swingarm, near the rear axle, up to the mark you have made on the rear guard. Write this measurement down in millimetres.
EVERYBODY BOUNCE!
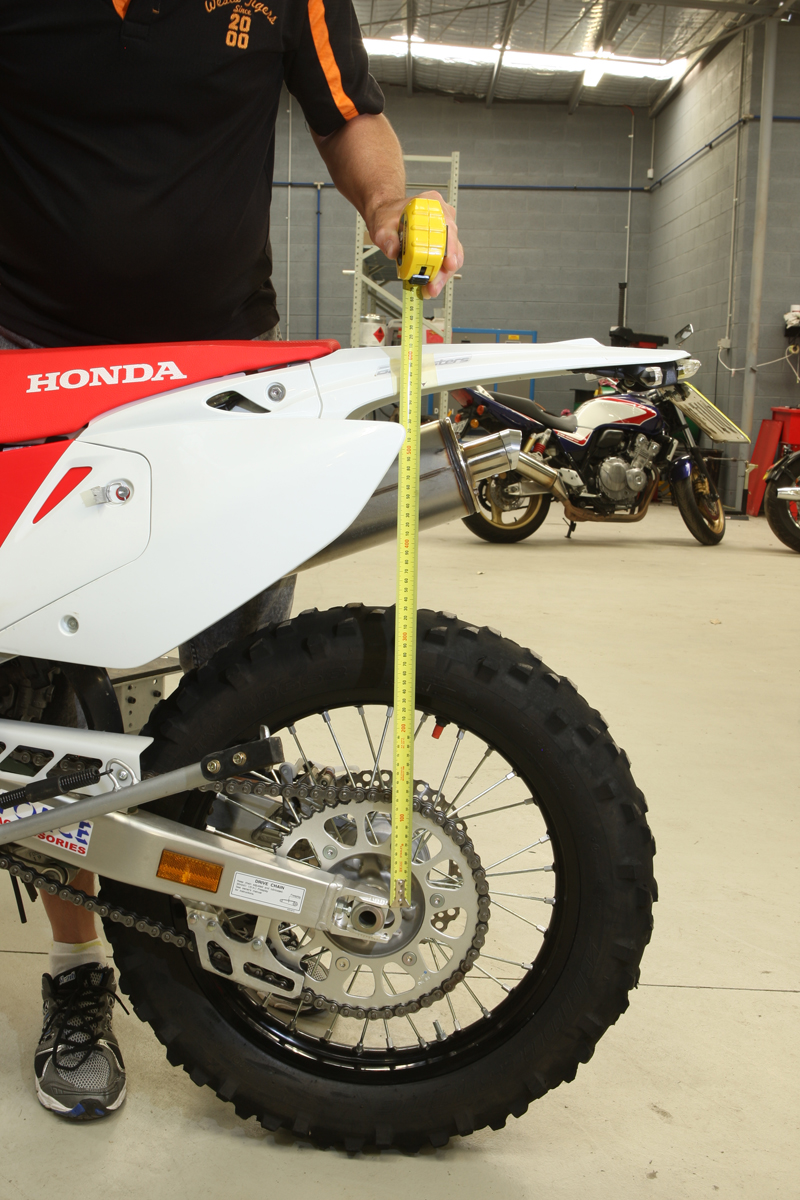
Now drop the bike off the race stand, so it rests on both wheels. Push down a few times on the seat, bouncing the rear suspension. Let the bike settle and take another measurement. Reference the same point on the swingarm, up to the same point on the rear guard. Some guys like to then lift the rear of the bike a few times, let it settle and measure again. It will be slightly different from the push-down method and you can take an average of the two.
MEASURE UP
When you take this measurement, have nothing resting on the bike, which should be balanced upright on its own weight. The difference between the two measurements (on race stand, then on wheels after bouncing) is the static sag measurement. There is no hard and fast number we’re looking for — different styles of bikes do require different static sag — but a good starting point for a trail bike is 25–30mm. If yours doesn’t measure up, don’t go adjusting anything yet — there’s more to do.
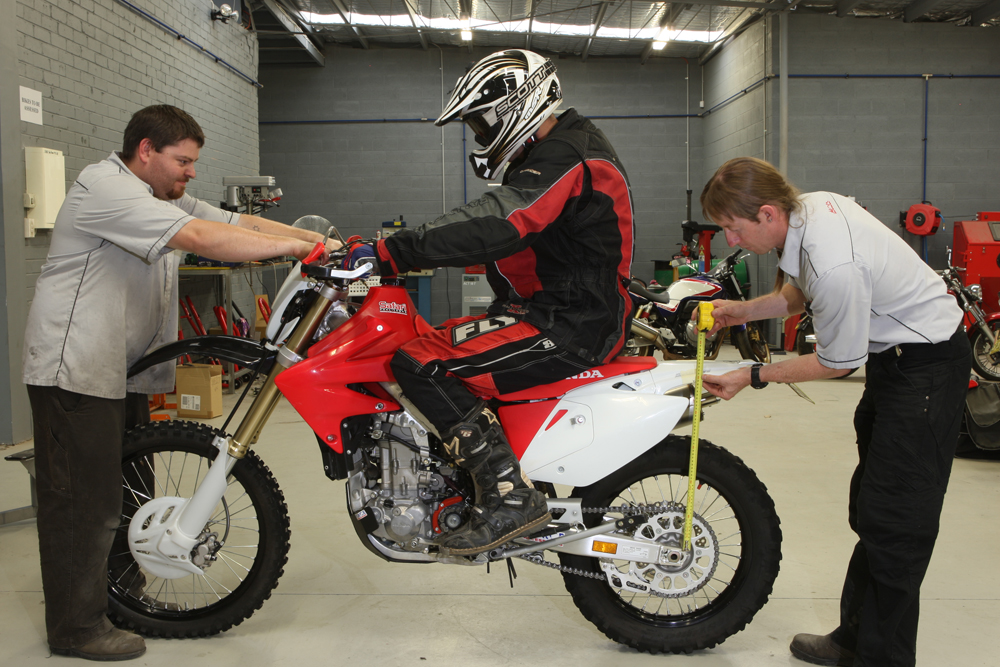
PHONE A FRIEND
With the aid of at least one friend, you can now measure the rider sag. Sit or stand in your normal riding position, bounce a little and let the suspension settle. You’ll either need a friend to balance the front of the bike or use your elbow to rest on a nearby wall. Both feet need to be on the bike. A good tip is to wear all your normal riding gear, including CamelBak and bumbag, so your riding weight is as accurate as possible. It will increase a lot once you get all your clobber on.
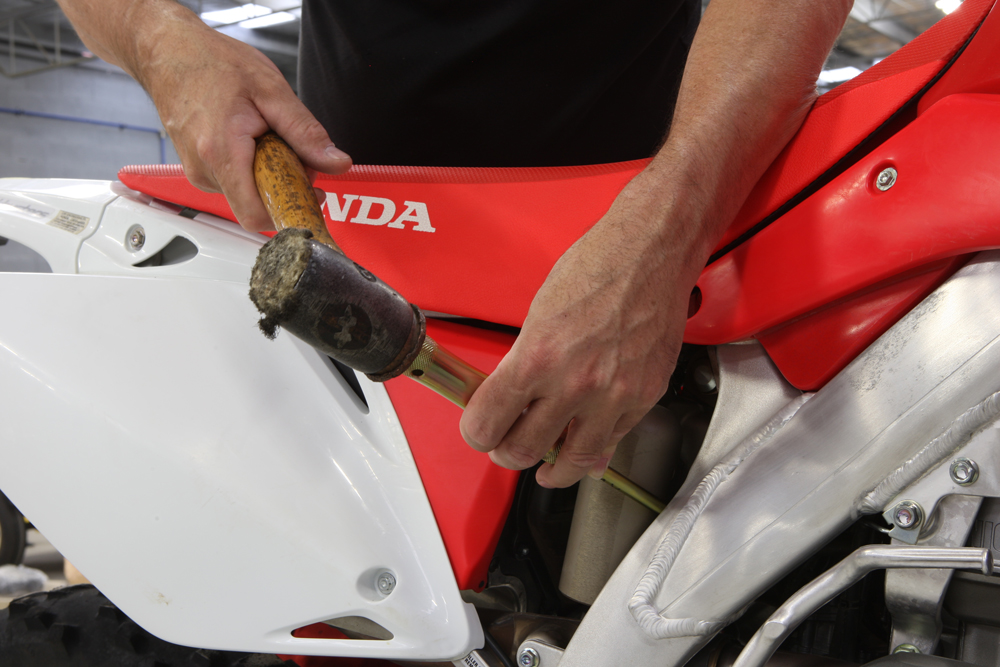
TIGHT NUTS
The rider sag should be approximately 100mm less than the initial race stand measurement. If it’s more, the spring preload needs to be adjusted by screwing down the adjuster nut to tension the spring. There are usually two nuts locked together; you might need gentle persuasion with a drift and hammer to disengage the two nuts. There are specific spanners but to use these you will need to remove the rear shock altogether to gain enough access. This can be time consuming if you don’t get the adjustment correct first go.
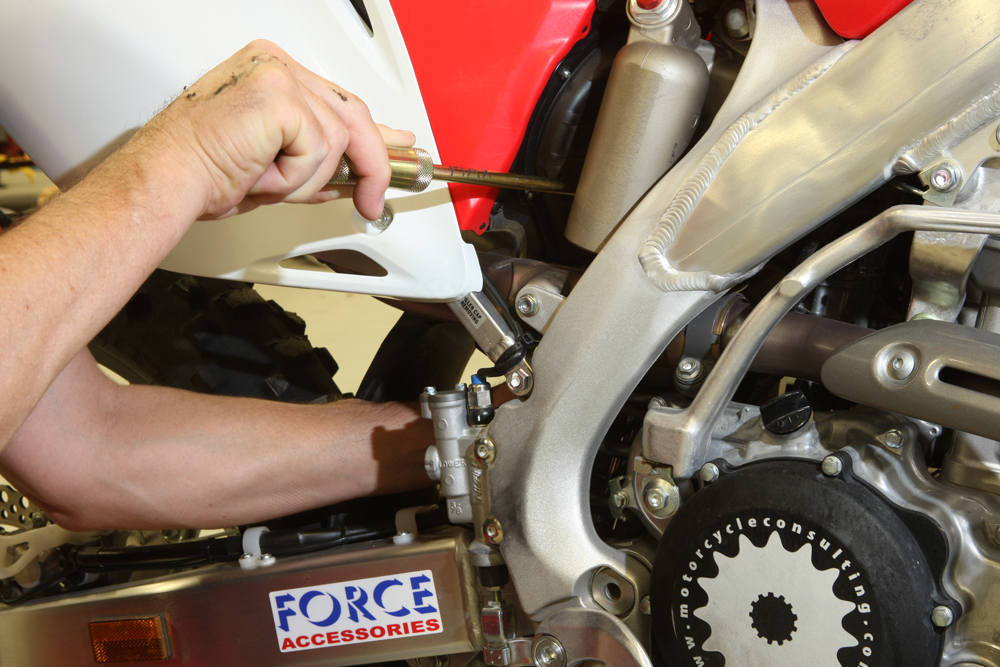
PUSH ’N’ TWIST
Put the bike back on the race stand. With the rear wheel off the ground, there will be less pressure on the rear shock spring. You should be able to turn the adjuster nut by pushing the slotted nut with a screwdriver, drift or T-bar. As you push, twist the spring with your other hand. You will be surprised how easy this is … until you get more preload on the spring. However, it’s doable with strong hands and much quicker than removing the rear shock to make the adjustment.
DOUBLE TAKE
Once you’ve adjusted the spring preload, go back to steps 2 and 3 so you can re-measure. Obviously the first measurement on the race stand will not change regardless of spring preload. You might take a few attempts to get the rider sag correct but it’s worth it in the long run. If you find the rider sag of 100mm leaves you with only 10mm of static sag, the spring is too soft for the rider. If rider sag of 100mm leaves you with 50mm of static sag, the spring is too hard for the rider.
NOTE WELL
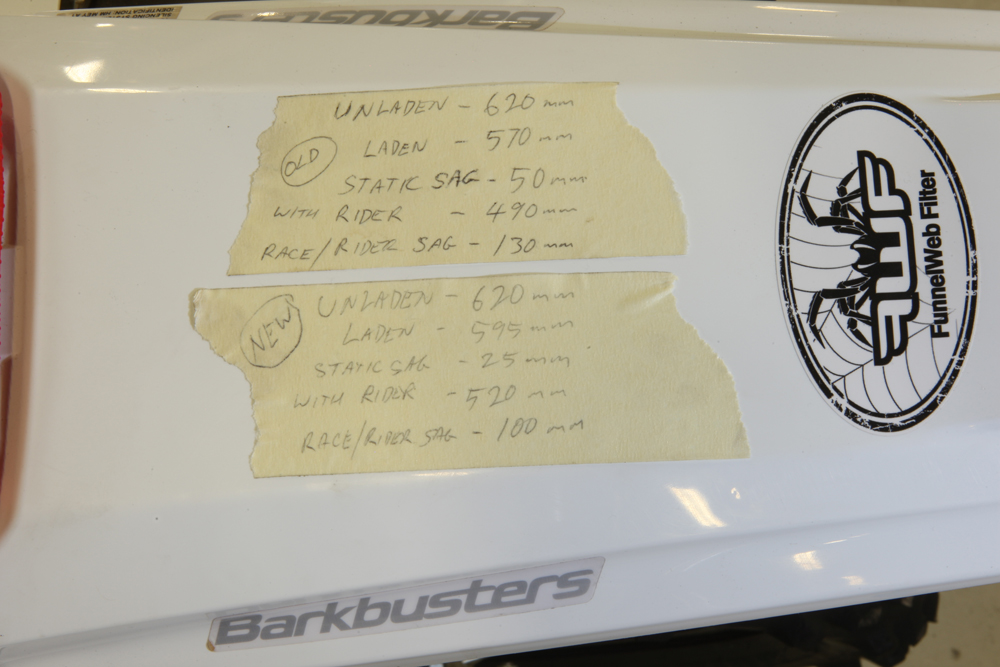
On a separate piece of masking tape, I took note of each measurement as we went along. You can see that the spring rate for this rider and this bike is just right. It’s a good idea to do at least one ride on a new bike before setting the ride height to give the shock spring time to settle in. It will most likely sag slightly after one or two rides. Don’t forget to lock up the lock nut against the adjuster nut on the spring so it all stays put. A light tap with the drift and hammer will lock them together.

REBOUND
While you’re looking at your back end, why not check the adjusters to make sure they’re set correctly? Use a suitable screwdriver and turn the adjuster screw in (clockwise) and count the clicks. Write this down. Now turn the adjuster screw out and count the clicks. You might come up with a number such as 12 of 20. Now you can adjust the screw in or out to feel the effects. If you’re unsure, just screw it all the way back in, then out 12 clicks, right back where you started from.
COMPRESSION
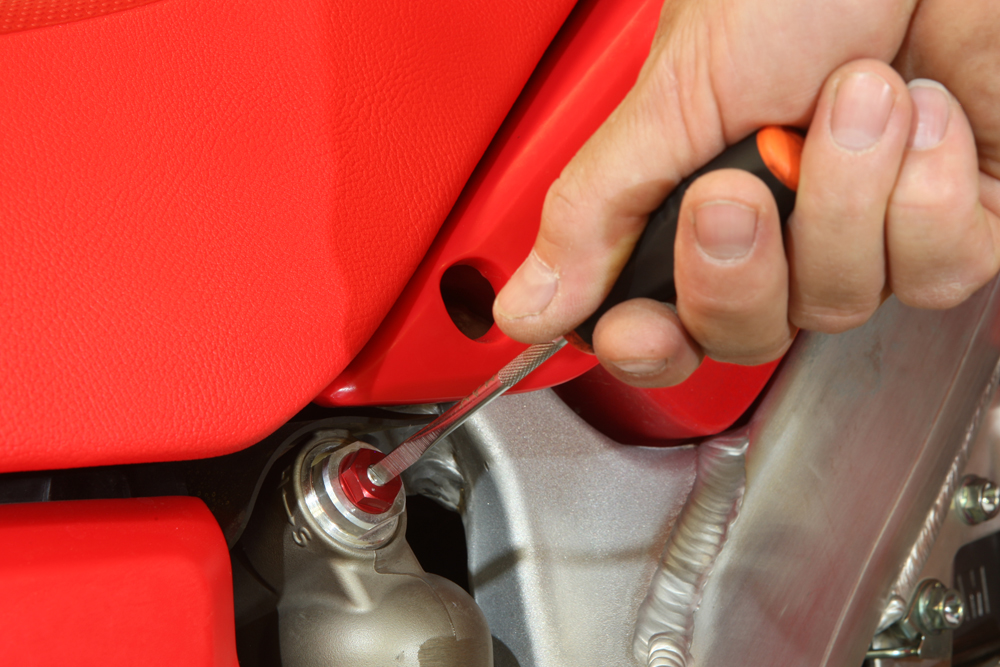
Most rear shocks now have two compression adjusters. The centre screw, adjustable with a screwdriver, is the low-speed circuit. The outer red anodised hex is the high-speed circuit. Check your initial adjustment in the same way as the rebound description above. Screw all the way in first, counting the clicks, then all the way out. Screwing in slows oil flow and shock movement while screwing out speeds up oil flow and subsequently shock movement.