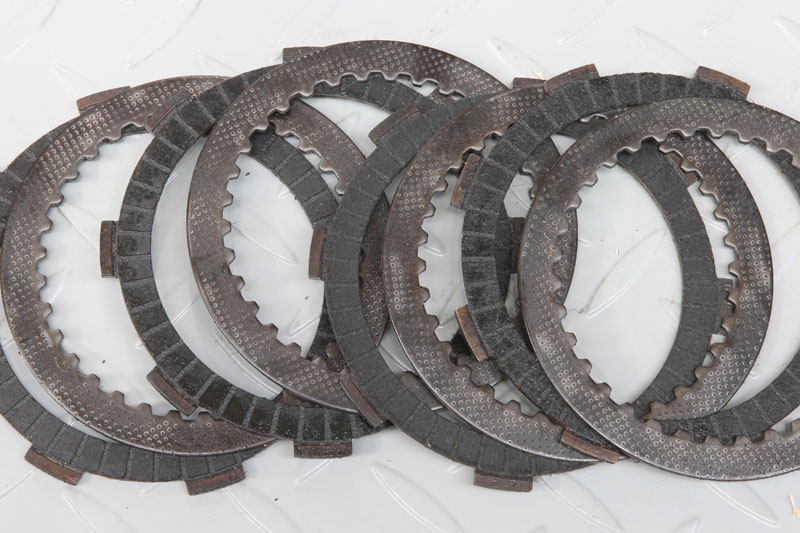
A burnt-out clutch will slip and reduce drive to the rear wheel. Once it starts to slip, heat will build up quickly and bring you to a halt with no drive at all!
STORY & PHOTOGRAPHY MAX SULLIVAN
Replacement of the worn-out parts is the only real fix for a buggered clutch but here’s one way you can get yourself back to civilisation so you can repair the clutch properly. It won’t fix the clutch, but it will give you “constant” drive to ride home. Starting and stopping without a clutch isn’t easy — but it’s less effort than pushing!
ACCESS ALL AREAS
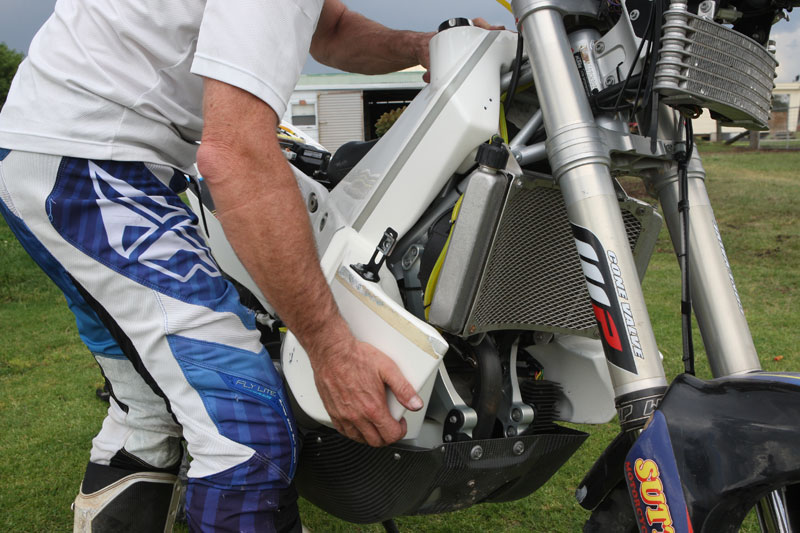
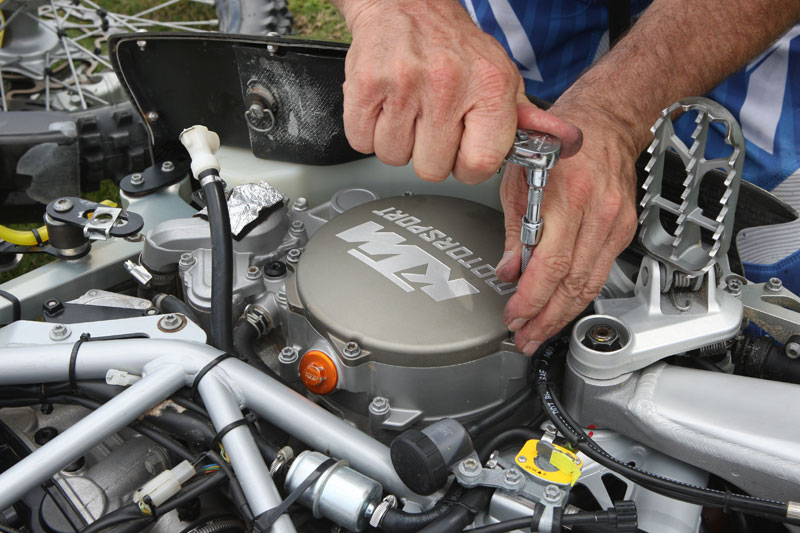
To demonstrate our bush mechanics, we are using a Dakar Rally-spec KTM450RR. While the clutch is accessible without the tank removal, it does give us more access to the clutch and will make the job easier, especially when all the components are still hot! Removal is quick and easy: one dry brake fuel line followed by three mounting bolts. With the tank now out of the way, it’s time to lay the bike on its side while we access the clutch.
OUTSIDE IN
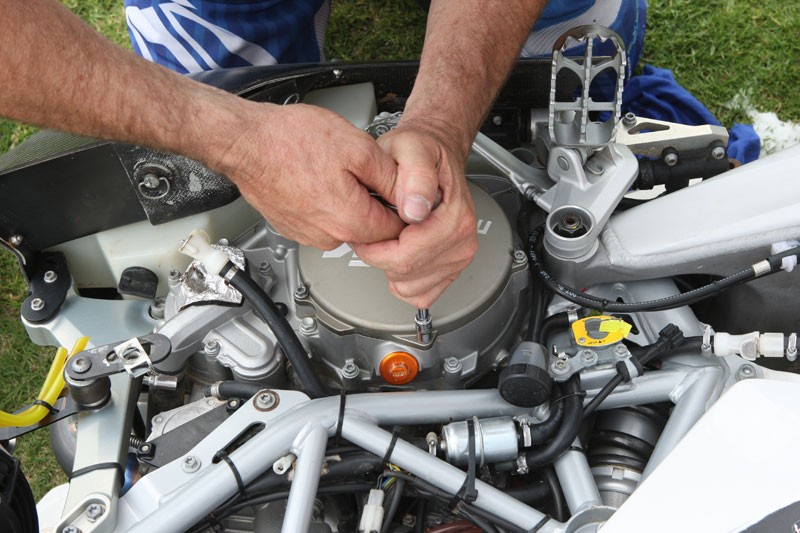
Many clutch covers have an outer cover as well as a main clutch cover. This gives easy access to the clutch for changing clutch plates. Most are sealed with an O-ring so removal and replacement is easy. If yours doesn’t have a small outer cover, you may have to drain the coolant, because the water pump is often mounted in the main clutch cover. This will take a bit more time and effort to remove but it’s not impossible. Just be careful when removing the cover not to damage the gasket.
PRESSURE IS ON
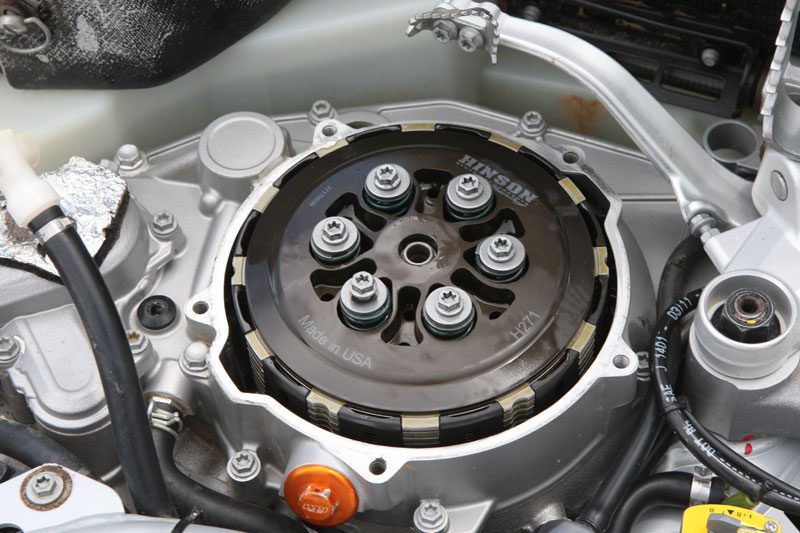
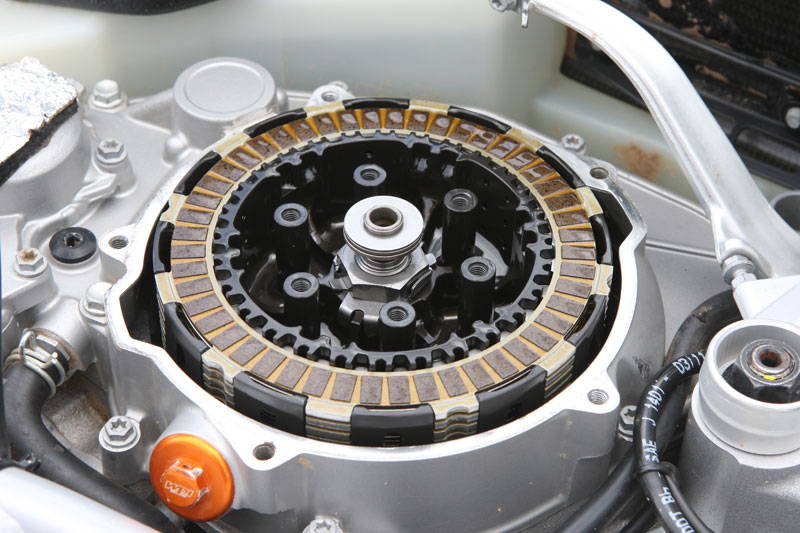
Now you can see the clutch. The top alloy plate is the pressure plate. As you pull in the clutch lever, a rod pushes (or in some cases, pulls) on the pressure plate to relieve the pressure on the clutch driver and drive plates. This allows the plates to separate, which disconnects the engine primary drive from transmitting power to the gear box. When the clutch lever is released, the clutch springs and pressure plate push the plates together, effectively joining them all together to transmit the engine power.
FEEL THE HEAT
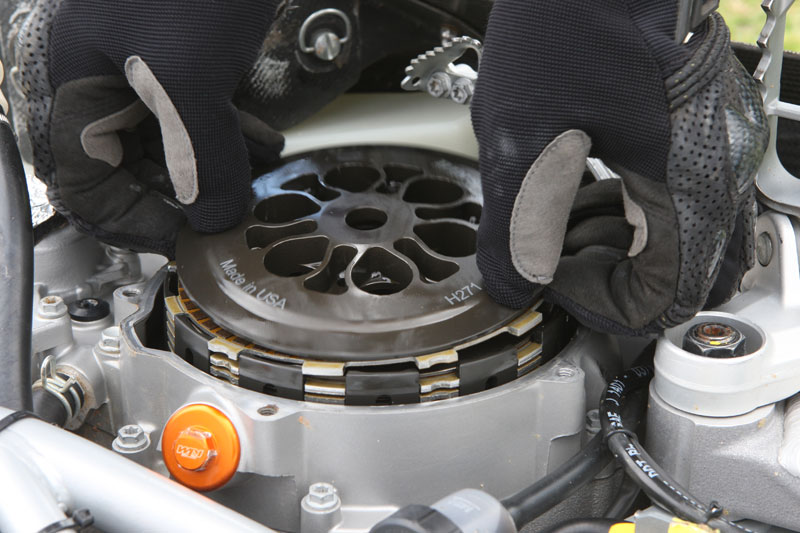
When removing the pressure plate, you need to undo the six bolts that go through the clutch springs. Undo them evenly, bit by bit, in a criss-cross pattern and remove the bolts, washers and springs. If you’re carrying out a roadside repair after suffering from a slipping clutch, the clutch will be extremely hot, so wear your riding gloves to prevent burns when touching the components. It’s a good idea to place the outer clutch cover on the ground, engine side facing up, to place the clutch parts in as you dismantle.
LUBE & THRUST
You now have access to the clutch plates. The centre push rod comes through the input shaft and has a machined end that houses two washers with a thrust bearing in between. The thrust bearing is used since the pressure plate will be spinning at high speed and the push rod needs to be isolated from the pressure plate when you pull in the clutch lever. You can see the clutch is well lubricated with engine oil, which is why you should never use car oil with friction modifiers. This will induce clutch slip in even a new clutch.
BROKEN CLUTCH
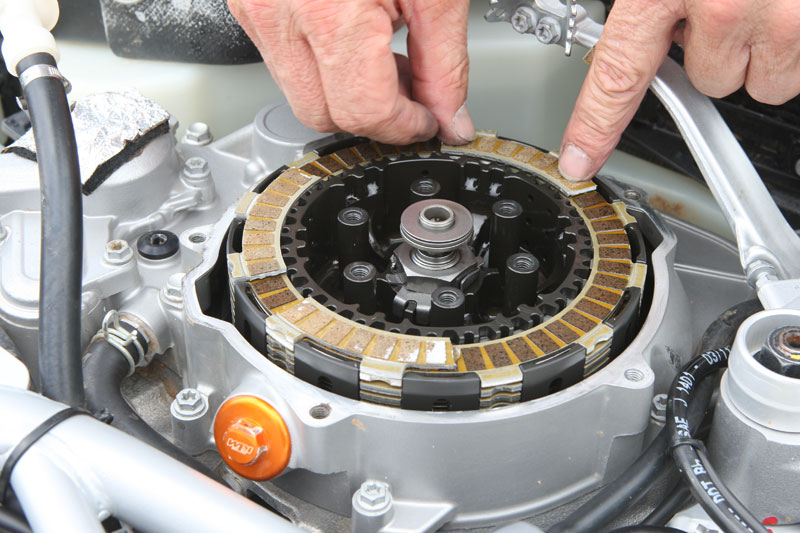
Many experienced rally riders carry either a complete clutch drive plate or one that’s been broken up into small pieces. These pieces are evenly spaced around the clutch to take up the excess clearance caused by a burnt-out clutch. If you have no spare plate, pull out one plate and snap it into several pieces. Stack two broken pieces together and place several stacks evenly around the clutch. Don’t worry about drive plate sitting against drive plate — they won’t be slipping. This bush repair locks the clutch to give constant drive.
STACKED UP
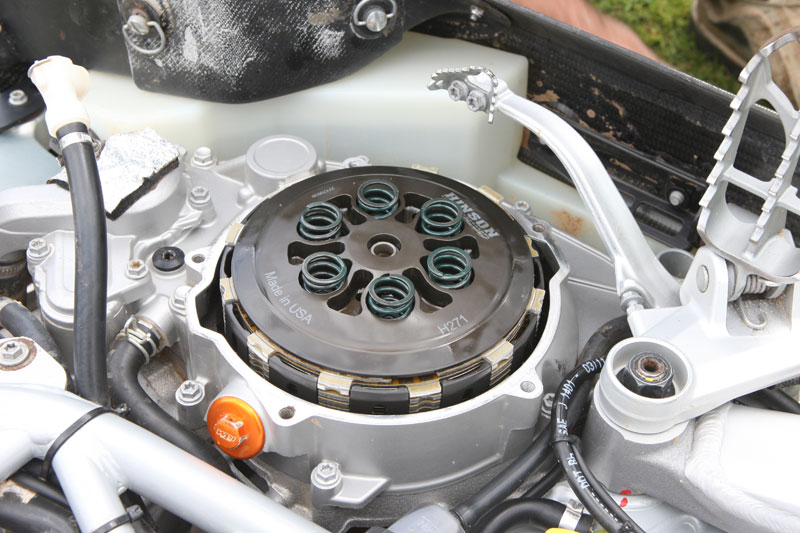
Now you can replace the clutch pressure plate. Note how much higher it sits? This is important to note and will be covered in the last section. The clutch springs can now be put back, ready for the bolts. It should be noted that when you get home and replace the worn-out plates, the clutch springs should also be replaced. The excessive heat from a slipping clutch can affect the compression pressure of the spring. If badly affected, the new clutch might wear out prematurely due to lack of pressure and increased slip.
WASHERS
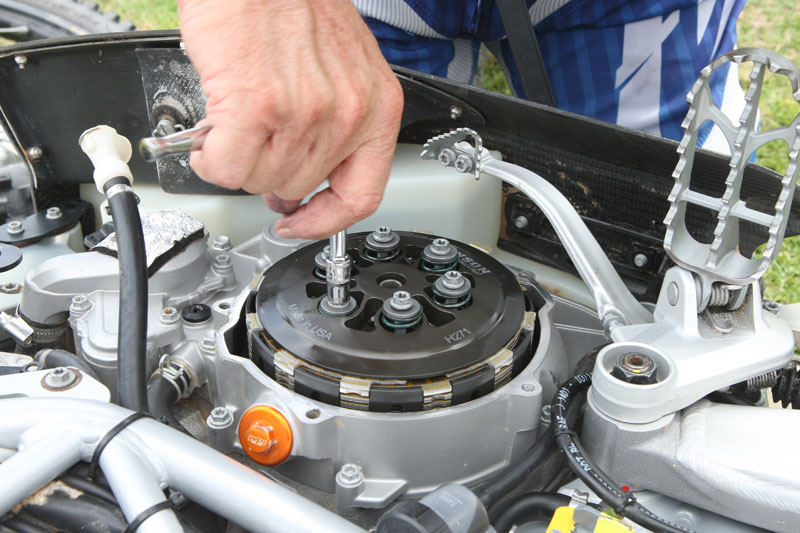
Once again, the criss-cross method should be employed when tightening the clutch spring bolts. Do not over-tighten these bolts as it’s rare for them to come loose. Most require only 10 or 12 newton metres of torque to do up, which is not much. It can be noted here that another method of getting you home with a slipping clutch is to place washers under the springs. This adds a little height to the spring and, when the bolts are seated, there can be a slight increase in spring tension.
COVER UP
Make sure the outer clutch cover gasket is not damaged or, in this case, the sealing O-ring is in position. There is usually a groove to locate the O-ring but they tend to fall out and can be pinched. Place the cover in position but, before you go tightening the bolts, push down with a little pressure and take a good look to see if the cover is seating all the way around. Depending on the size of the clutch and the size of the cover, there may not be much clearance. Carefully tighten the cover bolts but, again, be careful not to over-tighten.
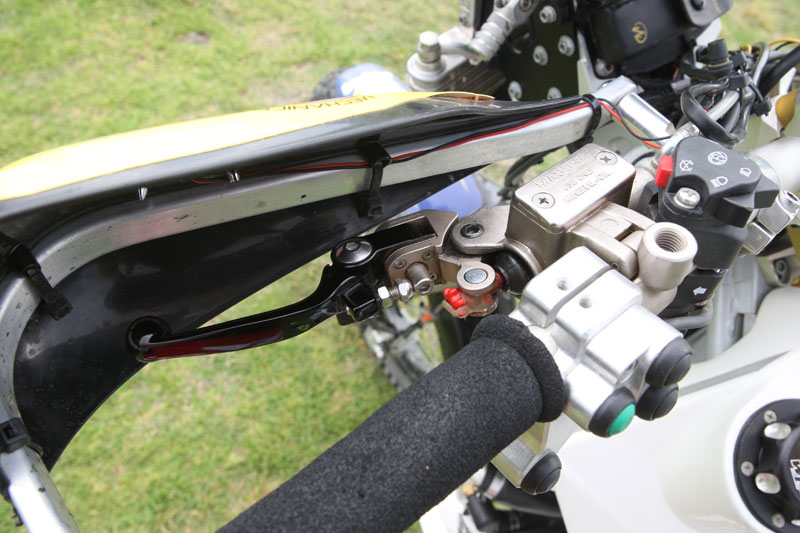
LEVER OUT
The reason we need to be careful with the cover is the pressure plate might now be gently resting against the inside of the cover. If that’s the case, starting the engine will spin the pressure plate, grinding away the cover. If the clearance is OK, pulling on the clutch lever will push the spinning pressure plate into the cover. It’s best to remove the clutch lever for the ride home. It’s not easy but it will stop you causing any more damage if you forget and pull on the lever. Now you just need to roll start, or start the bike in gear, and you’re off!