Engine hours mean more than kilometres these days so, if you don’t have a built-in hour meter, it’s time to fit one
An hour meter is a valuable piece of equipment for keeping track of the amount of work your bike’s engine has done. Many workshop manuals and maintenance schedules refer to hours, even if an odometer is fitted to the bike. So hook one up and keep your ride serviced on time and running like a new one.
STORY & PHOTOGRAPHY MAX SULLIVAN

HIDE’N’SEEK
There are several types of hour meters on the market. They usually run internal batteries that allow you to see the recorded engine hours even when the bike is turned off. Some hour meters are resettable, which can be handy when you rebuild the engine — you can reset the meter and record the hours of running after the rebuild. No external power is needed to run the meters but you will need access to the ignition coil high-tension lead or the “stick” ignition coil of the bike. Start by removing the seat.
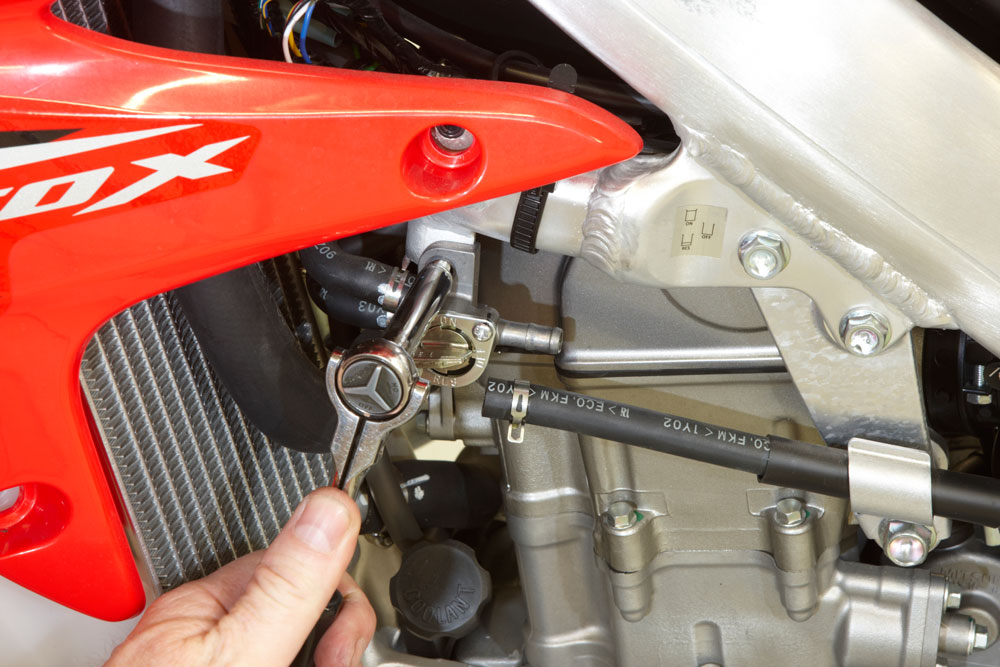
TAPPED OUT
The ignition coil is usually located under the fuel tank or close to the top of the engine. A high-tension-lead-type ignition coil has a large-diameter lead that joins the spark plug cap to the ignition coil. Unlike a car high-tension lead, a motorcycle lead is copper cored whereas car leads are usually carbon. If your bike has a stick coil, there will be two small-diameter wires which clip onto the spark plug cap, which is in fact the ignition coil. Now remove the fuel line and radiator shroud bolts ready to lift the fuel tank.
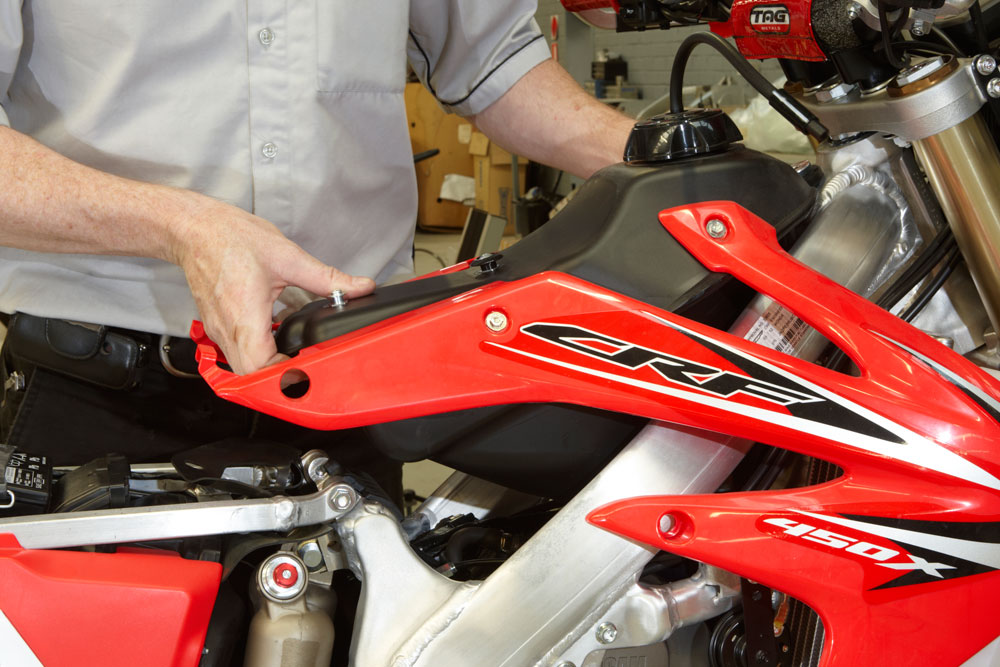
TANKS, MATE
Before you remove the fuel tank and radiator shrouds, check the side of the frame for a suitable place to locate your new hour meter. Most just attach with double-sided tape while others have two small self-tapping screws for mounting. You may want to be able to view the meter easily, so the frame or steering head is fine. If you plan on fitting a larger fuel tank or different shrouds, check the access to the position before mounting the hour meter. Putting self-tapping screws into an alloy frame is not something I’m a fan of.

WRAPPED UP
Having located the ignition coil, high-tension lead and spark plug cap, it’s time to start the installation. The hour meter will come with a thin-diameter wire that’s wrapped around the high tension lead — or the top of the stick coil — to pick up electrical pulses that will in turn activate the hour meter to record engine hours. Removing the spark plug cap will aid in wrapping this sensor wire around the high-tension lead. Wrap it around several times to ensure good conductivity of the electrical pulses.

STICKY TAPE
Once the sensor lead is wrapped around the high-tension lead, use some electrical tape to hold it in place. You can the take the sensor lead up along the length of the high-tension lead. It doesn’t matter how many times it wraps around or how far it follows the high-tension lead — as long as it picks up a signal, the hour meter will be accurate. Make sure the sensor lead doesn’t restrict the seating of the spark plug cap or the ability to move it out of the way while checking valve clearances.

ROUTE 66
Now feed the sensor lead back through some existing cable ties to locate it neatly out of the way and along the frame of the motorcycle. Since the other end of the sensor lead isn’t yet fitted to the hour meter, this should be an easy task and eliminates the need for extra cable ties that just clutter up the area under the fuel tank. Leave enough slack in the lead so it isn’t tight and won’t pull on the high-tension lead or spark plug cap.
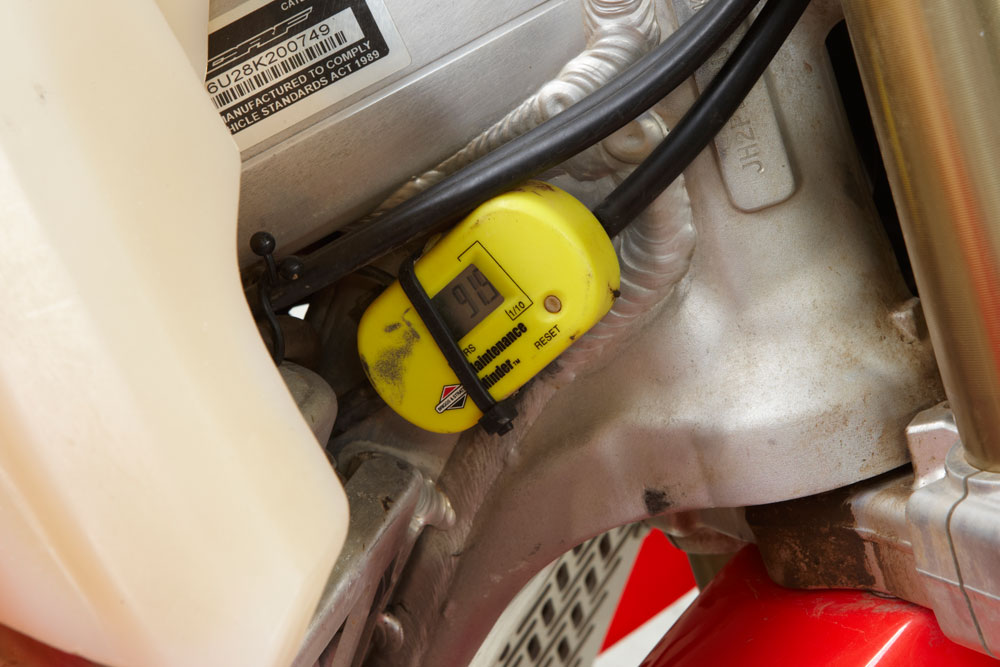
TRENCH COAT
The makers of this hour meter have made life very easy for us. The sensor lead has no permanent electrical connection to the hour meter itself. There is a small trench or groove on the underside of the hour meter that the sensor lead fits into. Since the lead is simply copper wire, it’s OK to cut it shorter if it’s too long. Otherwise, feed the sensor lead up to the area where you’re going to mount the hour meter. You can see the two holes on either side, which can mount the meter using self-tapping screws.

POKEMON
To ensure the sensor lead won’t dislodge during riding, make sure it’s all the way into the hour meter groove. Use a small flat-blade screwdriver to poke it all the way down. Note that the sensor lead is fitted along the entire length of the hour meter to ensure a good electrical pulse is given off and the meter will operate correctly. If you’re using double-sided tape to mount the hour meter, give the underside a good clean with white spirits or methylated spirits prior to mounting the tape.

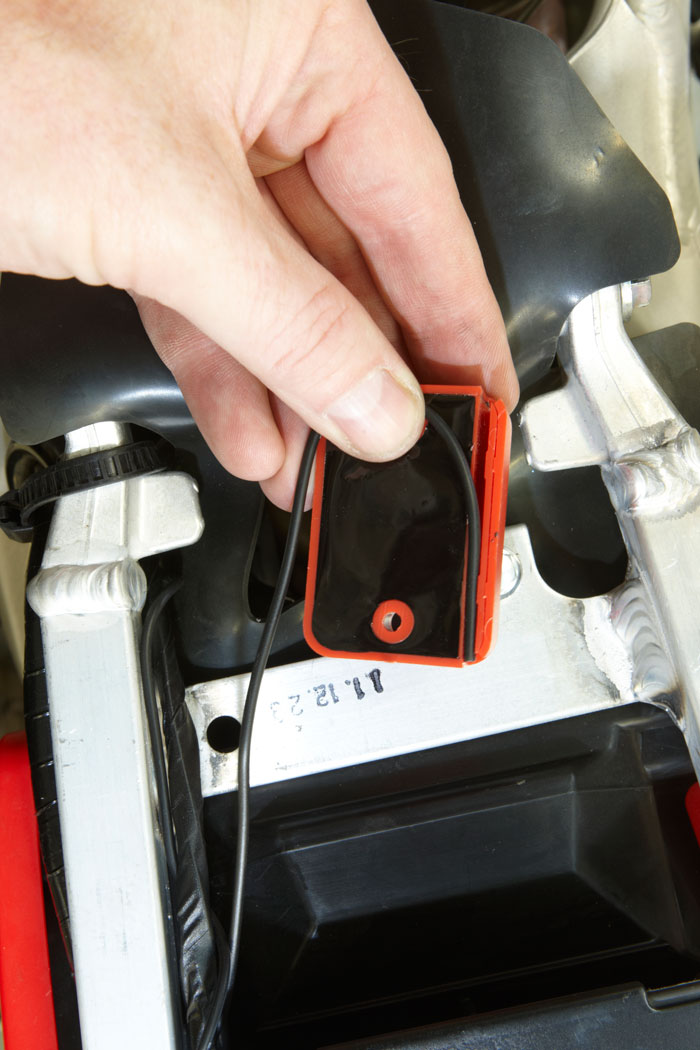
HIDDEN TREASURES
On this CRF450X, I plan on fitting a larger fuel tank in the near future. This makes it difficult to find a suitable mounting spot on the frame or steering head. I’ve decided to mount it under the seat; after all, I only need to record the hours when the bike is serviced and it’s not difficult to remove the seat to see how many hours are on the bike. The frame rail was cleaned and the double-sided tape applied. Once the meter was put on the tape, I held pressure for a minute to ensure a good bond.
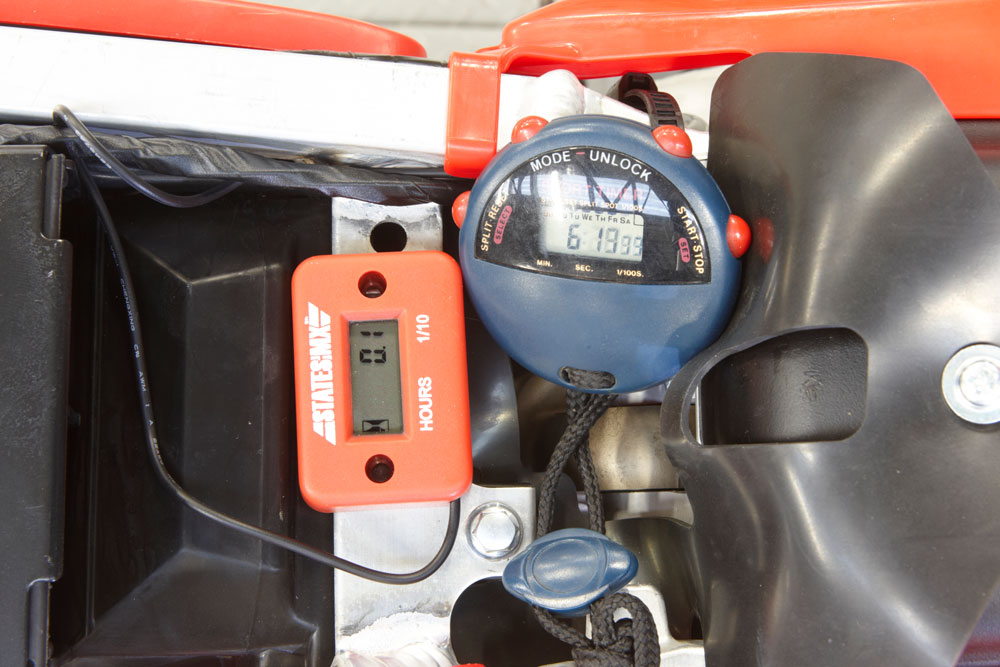
TESTING TIMES
As with most things, you should test it before packing all your tools away and hitting the trails. Hour meters measure in hours (thank you, Captain Obvious) so 0.1 hours is actually 6 minutes. Therefore, you will need to run the engine for a minimum of 6 minutes to see the meter move from 0.0 to 0.1. If by chance it doesn’t work, double check the sensor lead around the high-tension lead and wrap it around a few more times till you get a reading. Now, keep an eye on the hours and give your ride the love it deserves!