GET A GRIP: Keeping your feet attached to your bike is just as important as keeping your hands there
STORY & PHOTOGRAPHY MAX SULLIVAN
Different footpegs can give you more grip, a more secure feel and less boot wear as well as increased comfort. Compared to the narrow, standard footpegs, these wider, pivoting Pivot Pegz offer all of the above — so it’s time to fit them to the new bike.

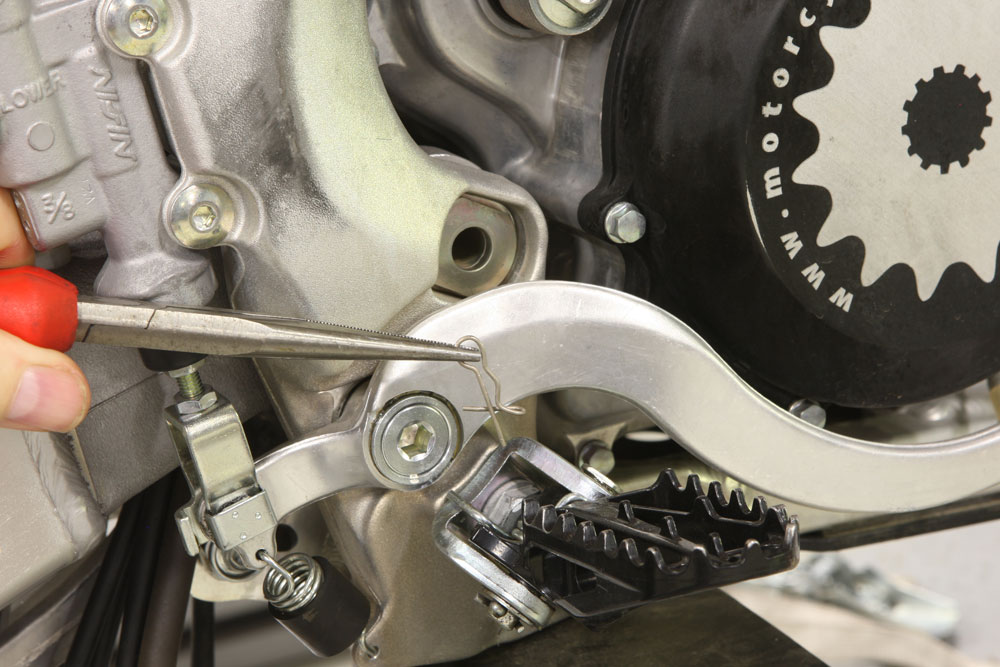
HOLD IT PINNED
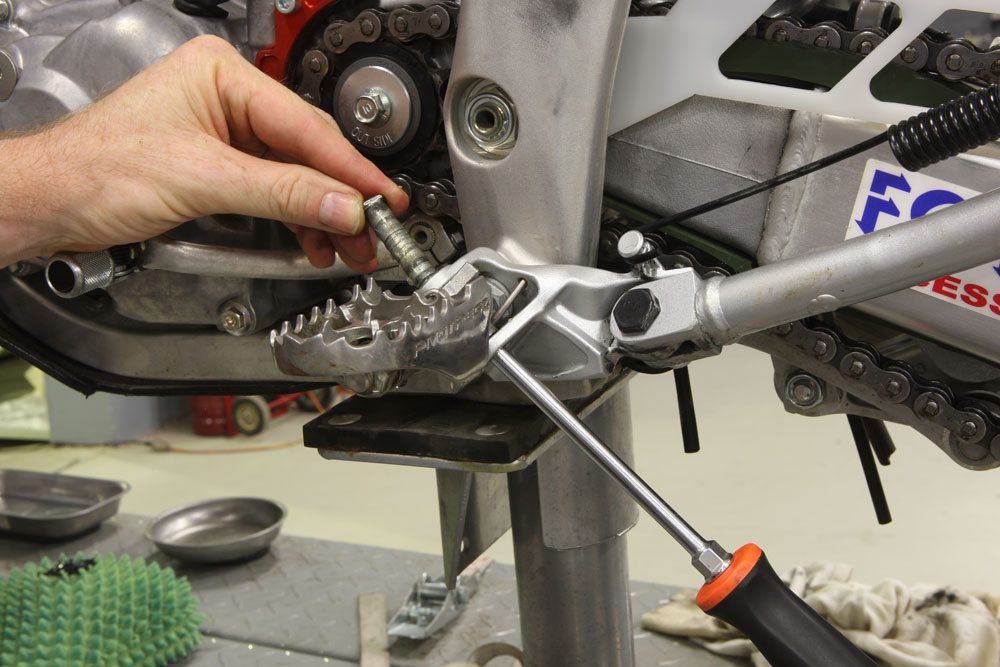
Footpegs can be cast or welded steel, cast or machined alloy, stainless steel or even titanium. Most are one-piece with a pivot pin and spring holding them onto the bike’s frame. A washer and split pin lock the pivot pin in place. The footpegs are allowed to pivot up, which reduces the chance of them breaking in a fall or impact. Start by using some side cutters to straighten out the legs of the split pin then grip the head of the split pin while pulling it through the hole in the pivot pin.
WIGGLE IT
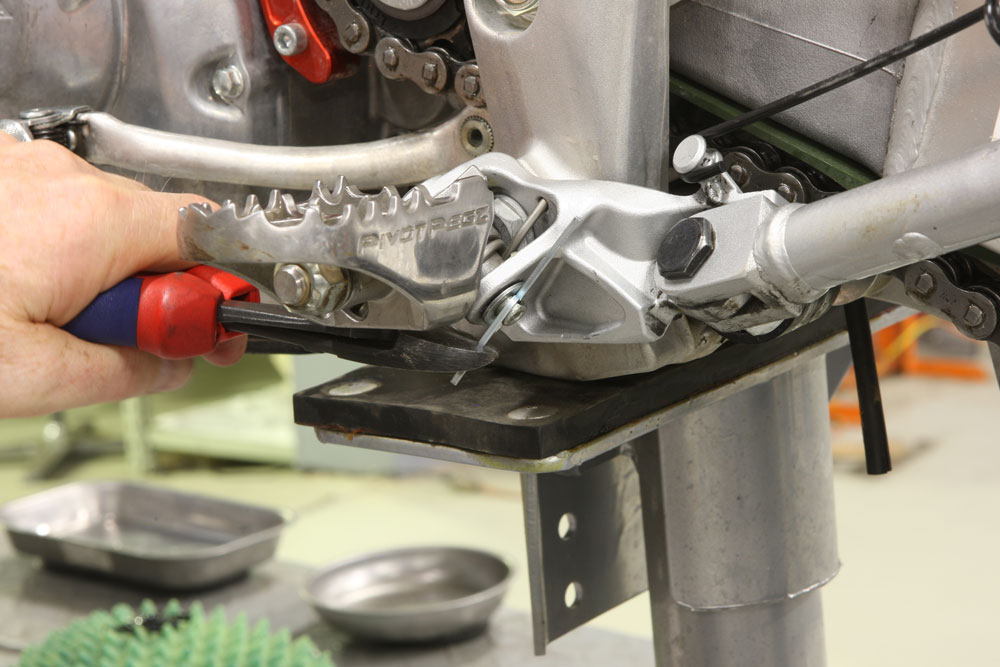
With the washer and split pin removed, you can now push the pivot pin up and out. This might be a little harder than you anticipate, since the footpeg spring is quite stiff and puts a lot of lateral pressure on the pivot pin. If it’s difficult to remove, hold the footpeg in one hand and wiggle it around as you push or pull on the pivot pin to remove it. Avoid punching it out with a drift as this will only score and damage the pivot pin.
WASHED UP
Clean the surfaces of the footpeg mount with some brake cleaner to remove old grease and dirt. Inspect the mounts for signs of wear or cracks. You might even put the pivot pin back through to see if the holes have been elongated over the years. Excessive wear in this area can cause the footpegs to droop and become difficult to ride with, increasing the chance of your foot slipping off.
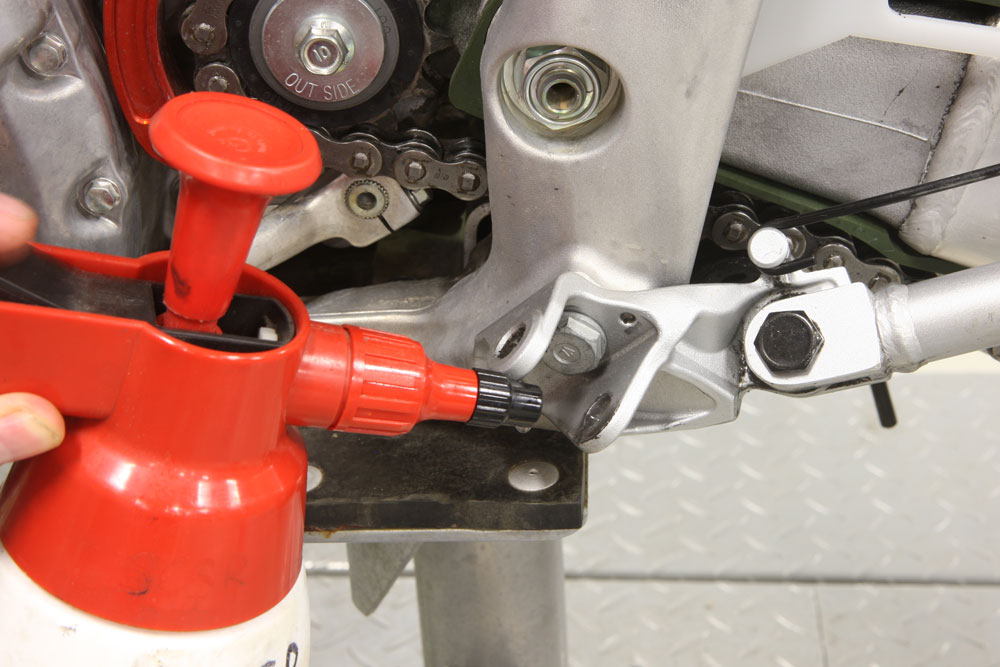
TIME FOR A BRAKE
Depending on how your bike is set up, it might be necessary to remove the rear brake lever to give enough room for the footpeg pivot pin to be removed. Some brake lever pivot bolts use Loctite on the threads while others use a clip or split pin to lock the bolt into place. Before unscrewing the pivot bolt, check inside the frame to see if a clip or split pin is used. Failure to do so will make life very difficult and damage to the bolt and thread will occur. Remove the return spring to allow the brake lever to move far enough to clear the pivot pin.
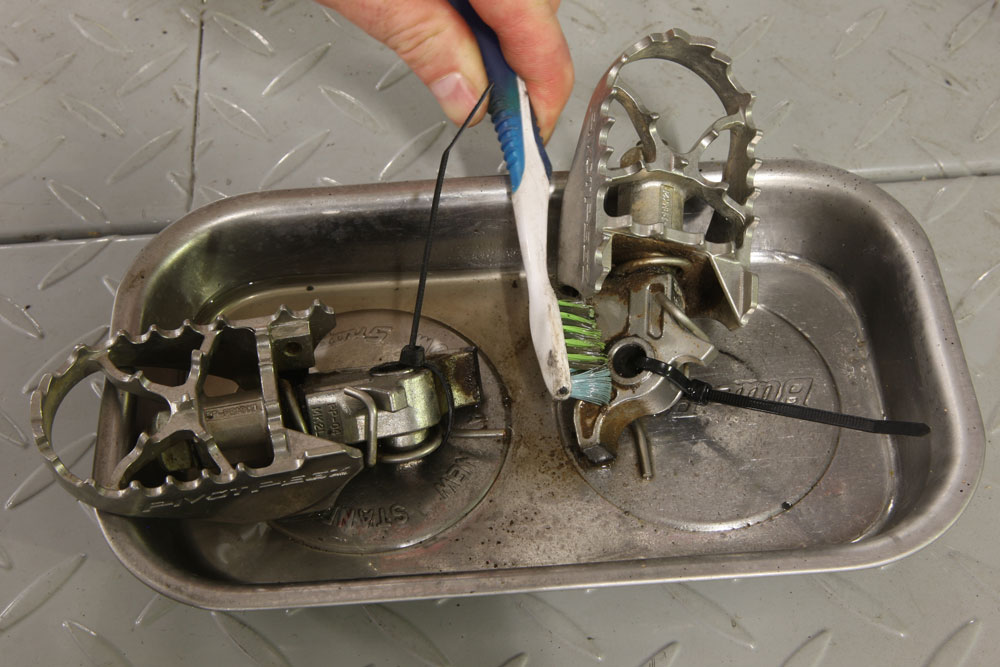
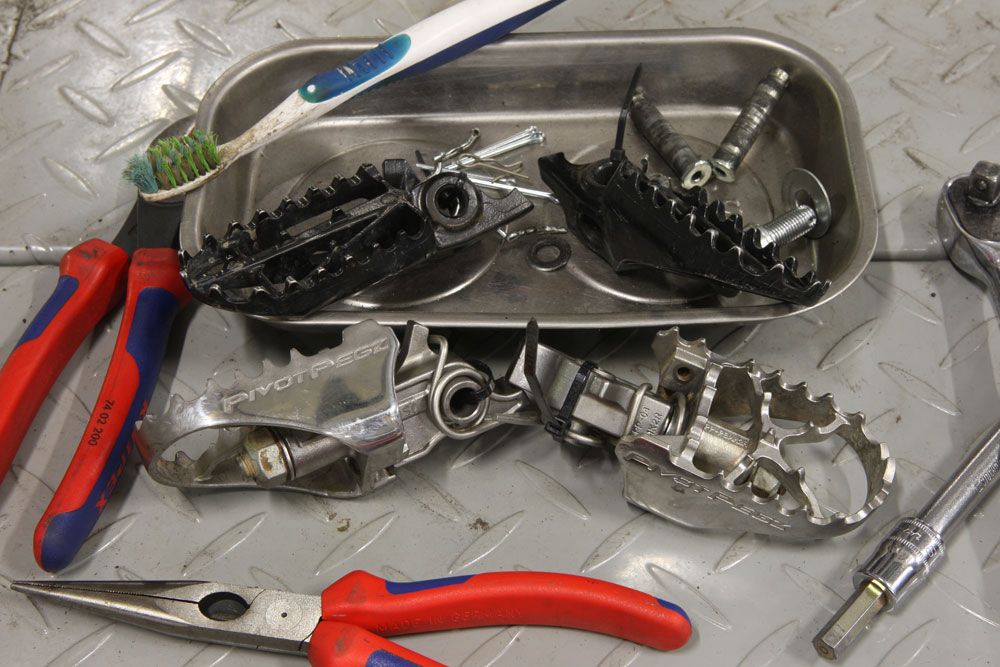
CLEANING LADY
These Pivot Pegz have been on my bike for four years. Before I fit them to the new bike, they need to be cleaned and lubricated. The nut on the end of the pivot is also checked for tension. Note how the return springs have been held in position with a cable tie so as not to mix them up when waiting for the new bike to arrive. If the springs are worn and losing their tension, a maintenance kit is available which supplies new springs and O-rings.
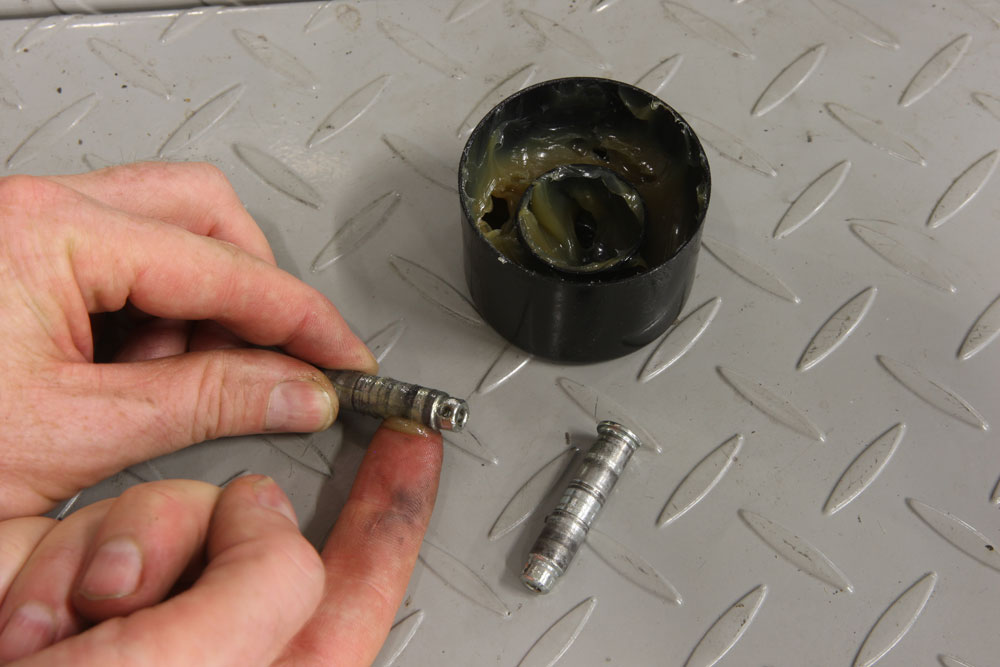
GREASY PIG
Check the pivot pins for wear and replace if there are deep grooves worn into the pin. Clean up any old grease, dirt and grime ready for fitting the new footpegs. Apply some grease to the pivot pin as lubrication. The best thing to use is waterproof grease but any grease is better than none. Once the pegs are on and in service, a spray lubricant will help, especially after pressure-cleaning your bike.
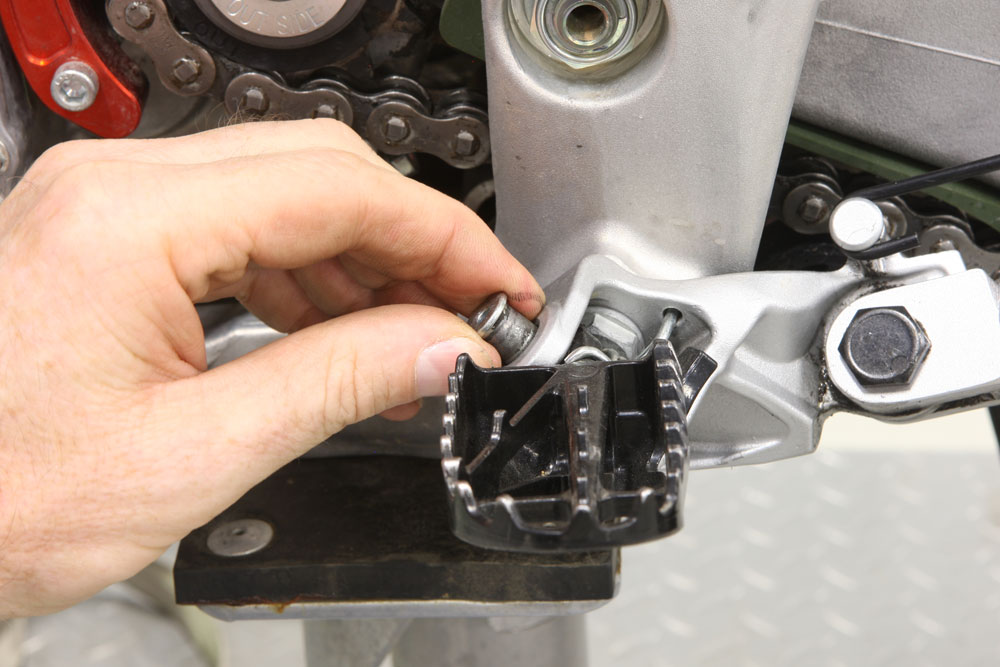
GUIDE DOG
Now it’s time to fit the Pivot Pegz. Make sure the return spring is in the correct position. There’s going to be some tension on the spring as you try to insert the foot peg. It can help if you guide the footpeg into position using a small drift, punch or screw driver to lever the footpeg against the spring tension. Push the pivot pin down into position as you withdraw the tool you’re using as a guide. Wiggling the footpeg will also help with locating the last part of the pivot pin.
NEW FOR OLD
Hold the washer in place then slide the split pin through the holes in the end of the pivot pin. The washer is there to prevent wear on the split pin as the footpeg pivots. Always use a new split pin. An old split pin may be weak from metal stress; vibration can also cause the split pin to fail. Fold both legs round the pivot pin and trim them with side cutters. Use the largest split pin that will comfortably slide through the hole.
R-CLIP
Fit the right-hand footpeg the same way, using some waterproof grease for lubrication. Use a new split pin to lock in the pivot pin then remount the rear brake lever. Grease the pivot bolt and screw it into the frame. This pivot bolts goes through the frame and a special R-clip is located in the end of the bolt to ensure the bolt cannot vibrate loose and fall out. If yours has no clip or split pin, secure it with Loctite.
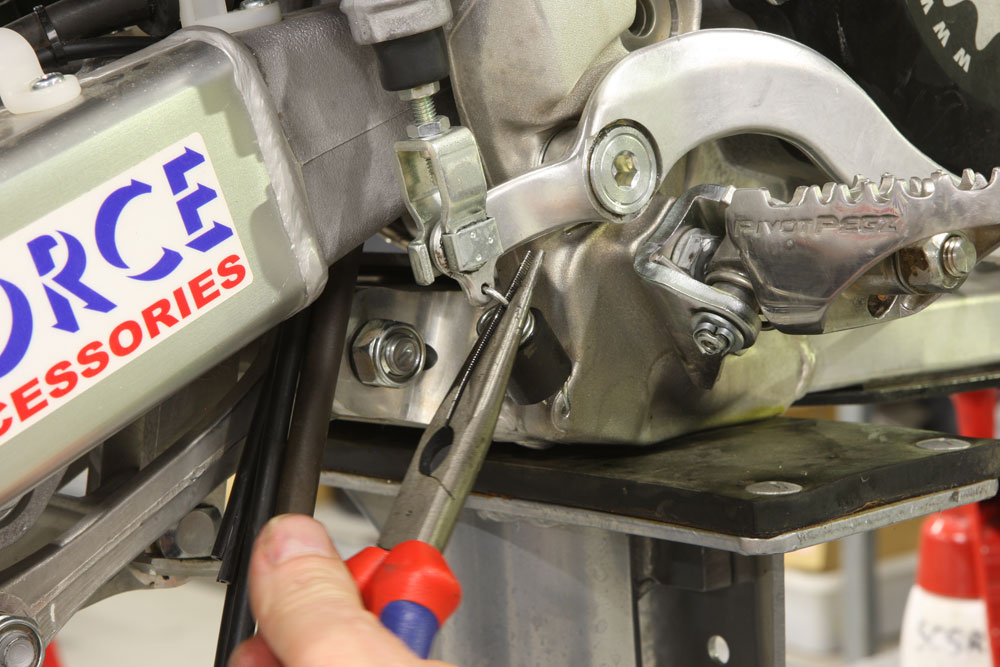
SPRING TIME
Reattach the rear brake return spring using some long-nose pliers. Stretch the spring only as far as you need to; putting too much pressure on the spring can stretch it past its elastic state, leaving the spring loose and not returning the brake lever correctly. Check the brakes for correct operation before riding. Now it’s time to feel the benefits of footpegs that pivot forward and back!